
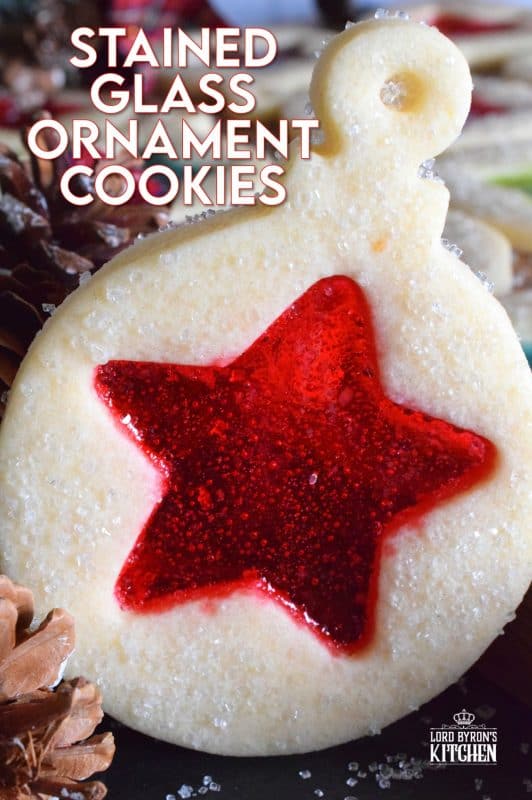
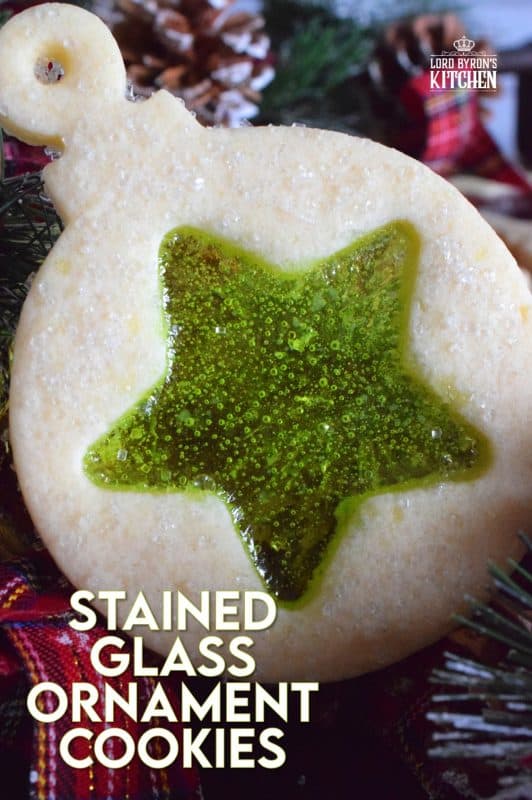
These beautiful Stained Glass Ornament Cookies are made with an easy rolled cookie dough, some glistening sanding sugar, and your favourite flavour of crushed Jolly Ranchers candy.

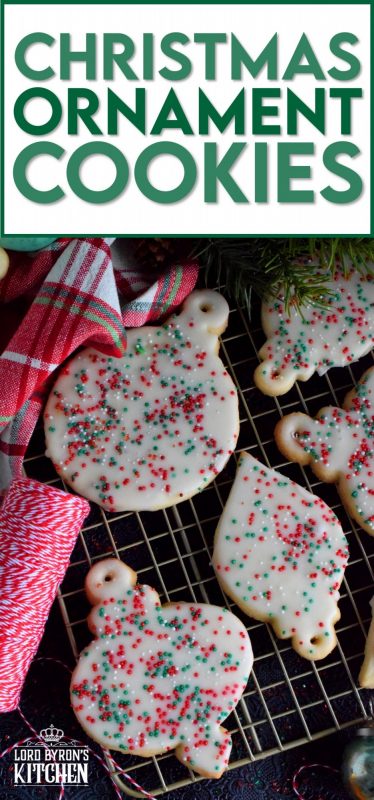
Last Christmas, I shared my Christmas Tree Ornament Cookie recipe with you. Even though those cookie cutters weren’t expensive, I was determined to get a second use out of them. Stained Glass Ornament Cookies had to be a part of this countdown for that reason and more. After all, what’s not to love about these gorgeous cookies?
Now, it might come as no surprise to my readers that I’m back with a third installment of Lord Byron’s 24 Cookies of Christmas. Should you be new here, let me tell you a bit about how this works. This is my third annual Christmas cookie extravaganza. Like the previous two years, I will post a brand new Christmas cookie recipe for 24 consecutive days. Yes, that means Saturdays and Sundays too! For your reference, you can find links to the first two years further down the page.
Fresh off of my 12 Biscotti of Christmas series, I’m excited to get this new series started. Last year, I also did 12 Bundt Cakes of Christmas. Now, who’s ready to get started on this journey with me? Do you have all of the ingredients? Are you ready to accidentally inhale Jolly Rancher candy dust? Did you employ a kid or two to help you with these fun and festive cookies? Is your apron on and your oven preheated? Good! Let’s get to it!

ORNAMENT COOKIE CUTTERS
I found my ornament cookie cutters on Amazon. If you don’t have any that are shaped like a Christmas tree ornament, and you’d like to get them, here’s the link for where I got mine.
Otherwise, you can use any other Christmas-themed cookie cutter. Just about anyone that has a cookie cutter container stashed somewhere at the back of a cabinet will have something Christmas-like.
Try gingerbread men, or Christmas trees, reindeer, stars, angels, etc. If you don’t have any of those, just use plain circular cookie cutters. Just remember that you will need two cookie cutters. First, you’ll need one for the ornament shape itself, or the outer cookie cutter, we’ll call it. Then, for the inner cookie cutter, you’ll need a smaller shape. That’s the one that will be filled with the crushed candy.
The important thing is to get the hole centered so that the cookie hangs properly! I use a paper straw to punch the hole out before baking. It works perfectly every time!
MORE CHRISTMAS COOKIE RECIPES!
Did you know that I’ve been posting a 24 Cookies of Christmas series for a few years now? There are over 100 Christmas cookie recipes that you can find right here at Lord Byron’s Kitchen! To make it easier to find, I have created a page for each series. Just click on the image below and you’ll find the full series for that volume all one page!

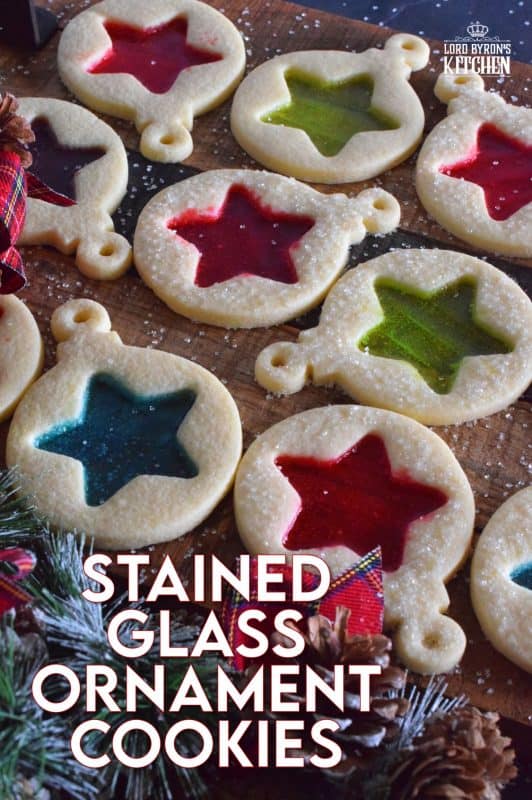
CAN I REALLY USE THESE COOKIES AS ORNAMENTS?
Yes! They will hang on a tree just perfectly and beautifully. Of course, you must remember that these ornaments are indeed food, so they will eventually grow stale and will need to be discarded. They will last in the open air for 5-7 days.
Once you hang them on the tree, I would not recommend eating them. A Christmas tree – real or artificial – is not food friendly! Also, keep in mind that these cookie ornaments have lots of sugar, so keep them away from your pets who might be tempted to eat them off your tree when you’re not looking!
I never hang them on our trees. In our home, they are meant to be eaten only. Besides, I’m a bit of a Martha, so our trees have to be completely matching and cohesive. Random ornaments are not an option!
HOW TO CRUSH THE CANDY
The only difficult part of preparing the Jolly Ranchers candy is opening them. Is it just me or do the wrappers cause anyone else stress? You have two options here. You can use a food processor or you can do it the old fashioned way with a rolling pin.
Place unwrapped candy into a sturdy bag and gently tap them with your rolling pin. This action should break them up a bit. Then, firmly roll over them with the rolling pin to crush them. They don’t have to be crushed to the point of being candy dust, but the smaller the pieces, the better they will melt down.
If you’re using a food processer, which is what I did, put the candies in, one colour at a time. Pulse once or twice and that should be all it takes. Before you open the lid, wait a second or two for the dust to settle. Otherwise, you’ll be breathing in candy dust!
MORE CHRISTMAS CONFECTIONS!
In some cases, we want more than a cookie. That’s why I have two more Christmas-themed collections you might want to consider. The first, is my 12 Bundt Cakes of Christmas, and the second is my 12 Biscotti of Christmas. Click on the image below to see each collection all on one page with links to each recipe!


STORING, PACKAGING, AND FREEZING
Time for bad news. If you plan to freeze these cookies, you can’t. Sorry, but the melted candy part does not work well at all. When you defrost the cookies, that candy center will be wet and sticky.
Stained Glass Ornament Cookies will last in a covered container at room temperature for 5-7 days. If you stack them, place a sheet of parchment paper between each layer to prevent the candy from sticking.

CONCLUSION:
As I said, every day I will be posting a new recipe. If you miss one, don’t fret. You can find my entire collection of Christmas Recipes right here! There are over 100 Christmas recipes and counting. There’s something for everyone! Cheers!


Stained Glass Ornament Cookies
Ingredients
- 1 cup butter, softened
- 1 cup sugar
- 1 large egg
- 1 tablespoon milk
- 3 cups flour
- 3/4 teaspoon baking powder
- 1/4 teaspoon salt
- 1/4 cup sanding sugar
- 24 whole Jolly Ranchers Candy, crushed
Instructions
- In a mixing bowl, use a hand-held mixer to beat together the butter and sugar until well combined – about 4 minutes.
- Add in the egg and milk. Beat to combine.
- Next, add the flour, baking powder, and salt. Beat into the butter and sugar mixture.
- The dough will be dry and crumbly at first, but keep beating until a dry dough is formed. In some cases, you might need to add one more tablespoon of milk. Knead dough to form a ball. Cover with plastic wrap and refrigerate for 2 hours.
- When ready to bake, preheat oven to 350°F. Prepare a baking sheet by lining it with parchment paper or a silicone baking mat. Set aside.
- Cut dough into 4 portions. Working with one portion at a time, roll dough to 1/4 inch thick between two sheets of parchment paper.
- Use your larger cookie cutter to cut the exterior shape of the cookie. Use your smaller cookie cutter to cut out the center. Use a metal spatula to transfer the cookie to prepared baking sheet. Save the leftover dough. Re-roll to make more cookies.
- Using a straw, push straight down to cut a hanging hole into the cookie.
- Fill the center hole with the crushed candy, using the colour of your choice. The candy should be level with the top of the cookie. A little more or less will not make a difference. If you get any candy on the cookie, use a small, clean paintbrush to brush the candy into the center hole.
- Top each cookie with a generous sprinkling of sanding sugar.
- Bake for 8 minutes. Remove from oven and allow to cool for 5 minutes on baking sheet. Carefully transfer to a wire cooling rack to finish cooling.
Nutrition


Kate says
Wow. Those cookies look really great and delicious. I will not hang them on my tree though. I’d rather eat them. 🙂 I’m looking forward to making them followed by the even more delicious part together with my family. Thanks for sharing this recipe.
Pam Greer says
These are such pretty cookies!! Everyone oohs and aahs over them!