
Sure, you can buy these pre-made, but they’re never as good as homemade! Also, I have a secret ingredient that will make your Graham Crumb Pie Crust so much better than store-bought. Read on to learn how!
GRAHAM CRUMB PIE CRUST
There are so many desserts that start with a graham crumb base. I have a recipe for such a base that I use over and over again. I thought I would share it with you!
Graham crumbs are one of those ingredients we see quite often, but in most cases, it’s already worked into an existing recipe or ingredient. Well, what happens when you want to make something from scratch?
You need to know how to make a graham crumb pie crust or base that you can use in many recipes. All you need to make this delicious no-bake crust is three ingredients!
WHAT YOU WILL NEED FOR THIS RECIPE:
- Graham Crumbs – I always try to find the crumbs rather than using the wafers. It just saves me from dirtying up my food processor. Don’t use a cheap, no-name brand. If you can afford the extra dollar, buy a good brand. Personally, I prefer Keebler brand, but they’re really hard to find in Canada, so my second choice is Honey Maid.
- Butter – Use salted butter. If you don’t have salted butter, add 1/4 teaspoon of salt to your crumb mixture.
- Cinnamon – That’s my secret ingredient! Such a common ingredient, but it adds such a warm flavour to the mixture. You’ll love it!
HOW TO MAKE A GRAHAM CRACKER PIE CRUST:
- Add the graham crumbs and cinnamon to a mixing bowl. Whisk to combined.
- Pour the melted butter over the graham crumb mixture.
- Use a hand-held mixer to beat the butter evenly into the crumbs. Start off on low speed, and gradually increase until the crumbs are moistened and resemble wet sand.
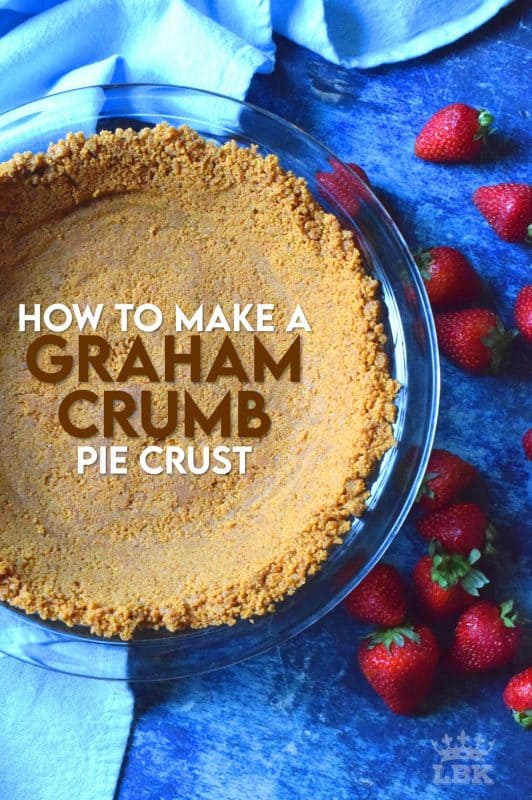
- Transfer the mixture to a pie plate or pan. Using a drinking glass with a flat surface, or a small measuring cup, gently press the mixture around the plate, being sure to push the mixture up the sides.
- Don’t apply too much pressure. Once you’re satisfied with the sides, even out the bottom or flat part of your pie plate. This is where I apply more pressure just to get a firm base. You’ll be happy you did when you cut the pie!
- Refrigerate for 30-40 minutes to firm up before adding any filling or topping.
WORKING WITH GRAHAM CRACKERS
If you already have graham crackers on hand, there’s no need to buy graham crumbs. Using your hands, break the crackers into smaller pieces, adding them to the bowl of a food processor as you go.
Add the cinnamon to the top of the crumbled crackers. Pulse the crackers a few times until the mixture resembles sand. You might be tempted to pour the melted butter in too, but do not do it!
Pulsing the crumb mixture with the butter will result in a very fine crumb, and your base will have very little texture. You run the risk of the mixture being too soft or runny to form into an even crumb crust.
HOW TO USE YOUR GRAHAM CRUMB CRUST
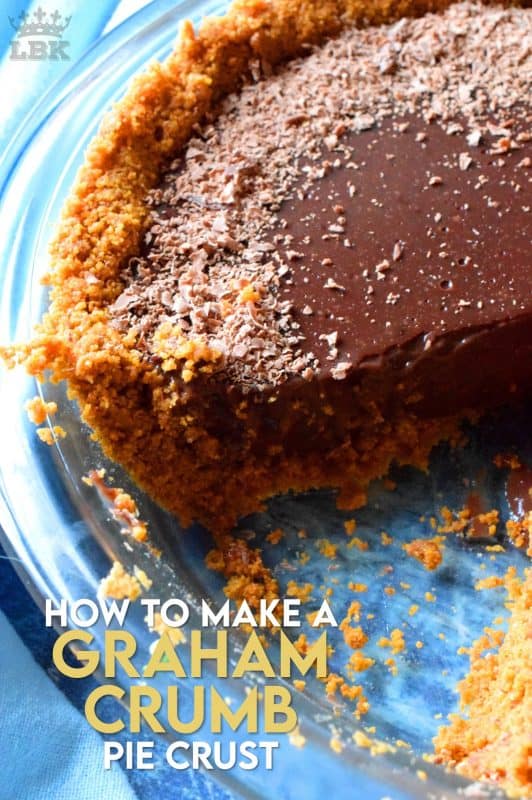
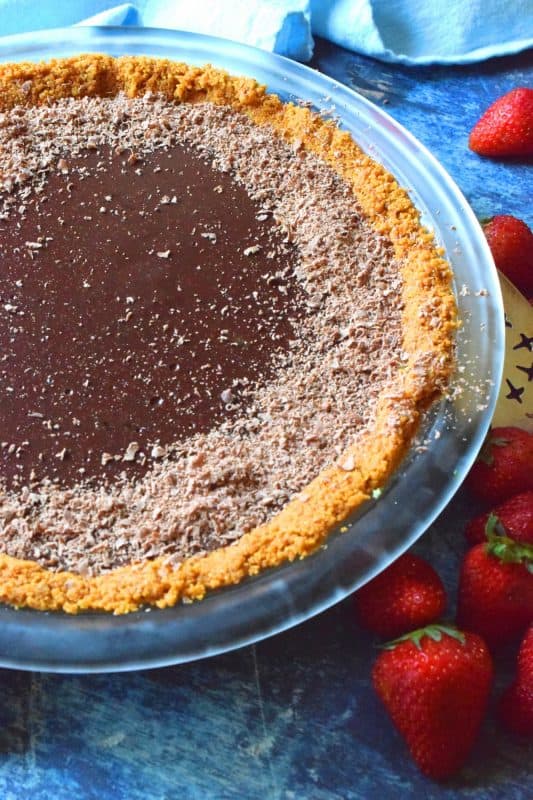
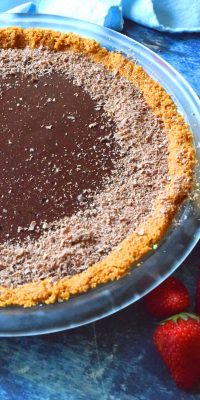
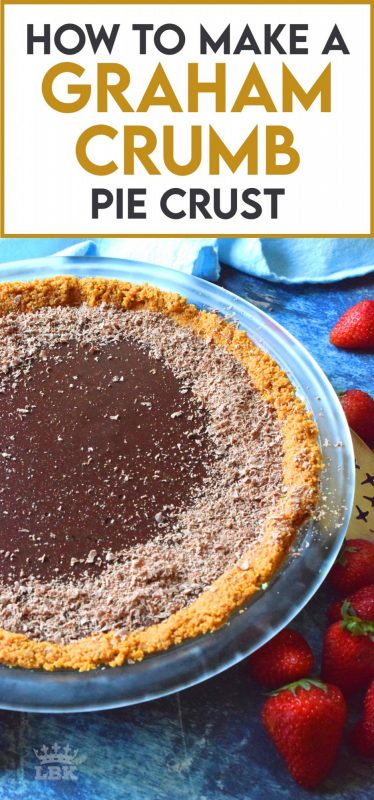
This recipe lends itself to all kinds of desserts. I use it quite often. For example, for the purpose of these photos, I whipped up one of our favourite chocolate pie fillings. Then, I shaved some chocolate around the perimeter of the pie. Serve it with fresh strawberries for an easy and delicious dessert!
One of my favourite ways to use the crust is in a no-bake cheesecake. This is one dessert that we cannot get enough of! Did you know you can top a no-bake cheesecake with jam? Oh, yes, Dear Reader, you most certainly can! See for yourself in my Mom’s No-Bake Cheesecake post.
Oh, and if you love butterscotch, try this Butterscotch Lush! It’s so easy to prepare and so delicious.
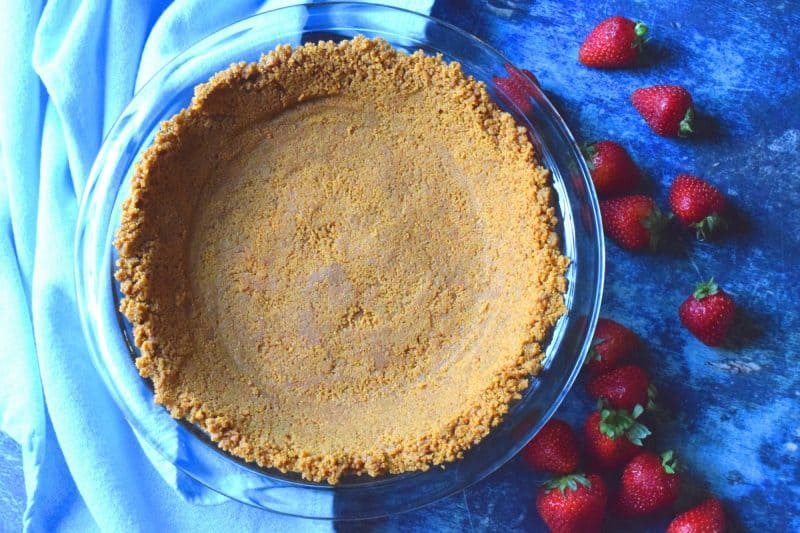
Note the darker parts of my crust in the unfilled photos? That’s the butter being pressed into the crumb mixture. It’s nothing to worry about. It just means that my crust is pressed firm on the bottom.


How to Make a Graham Crumb Pie Crust
Ingredients
- 3 1/2 cups graham crumbs
- 1/2 cup butter, melted
- 1 teaspoon cinnamon
Instructions
- Add the graham crumbs and cinnamon to a mixing bowl. Whisk to combined.
- Pour the melted butter over the graham crumb mixture.
- Use a hand-held mixer to beat the butter evenly into the crumbs. Start off on low speed, and gradually increase until the crumbs are moistened and resemble wet sand.
- Transfer the mixture to a pie plate or pan. Using a drinking glass with a flat surface, or a small measuring cup, gently press the mixture around the plate, being sure to push the mixture up the sides.
- Don’t apply too much pressure. Once you’re satisfied with the sides, even out the bottom or flat part of your pie plate. This is where I apply more pressure just to get a firm base. You’ll be happy you did when you cut the pie!
- Refrigerate for 30-40 minutes to firm up before adding any filling or topping.
Notes
Nutrition


kate says
Knew it would be cinnamon. Everyone does that now and it takes away from the flavor of the pie in my opinion. I do like that you don’t add sugar. The grahams are sweet enough and generally so is the pie filling.