
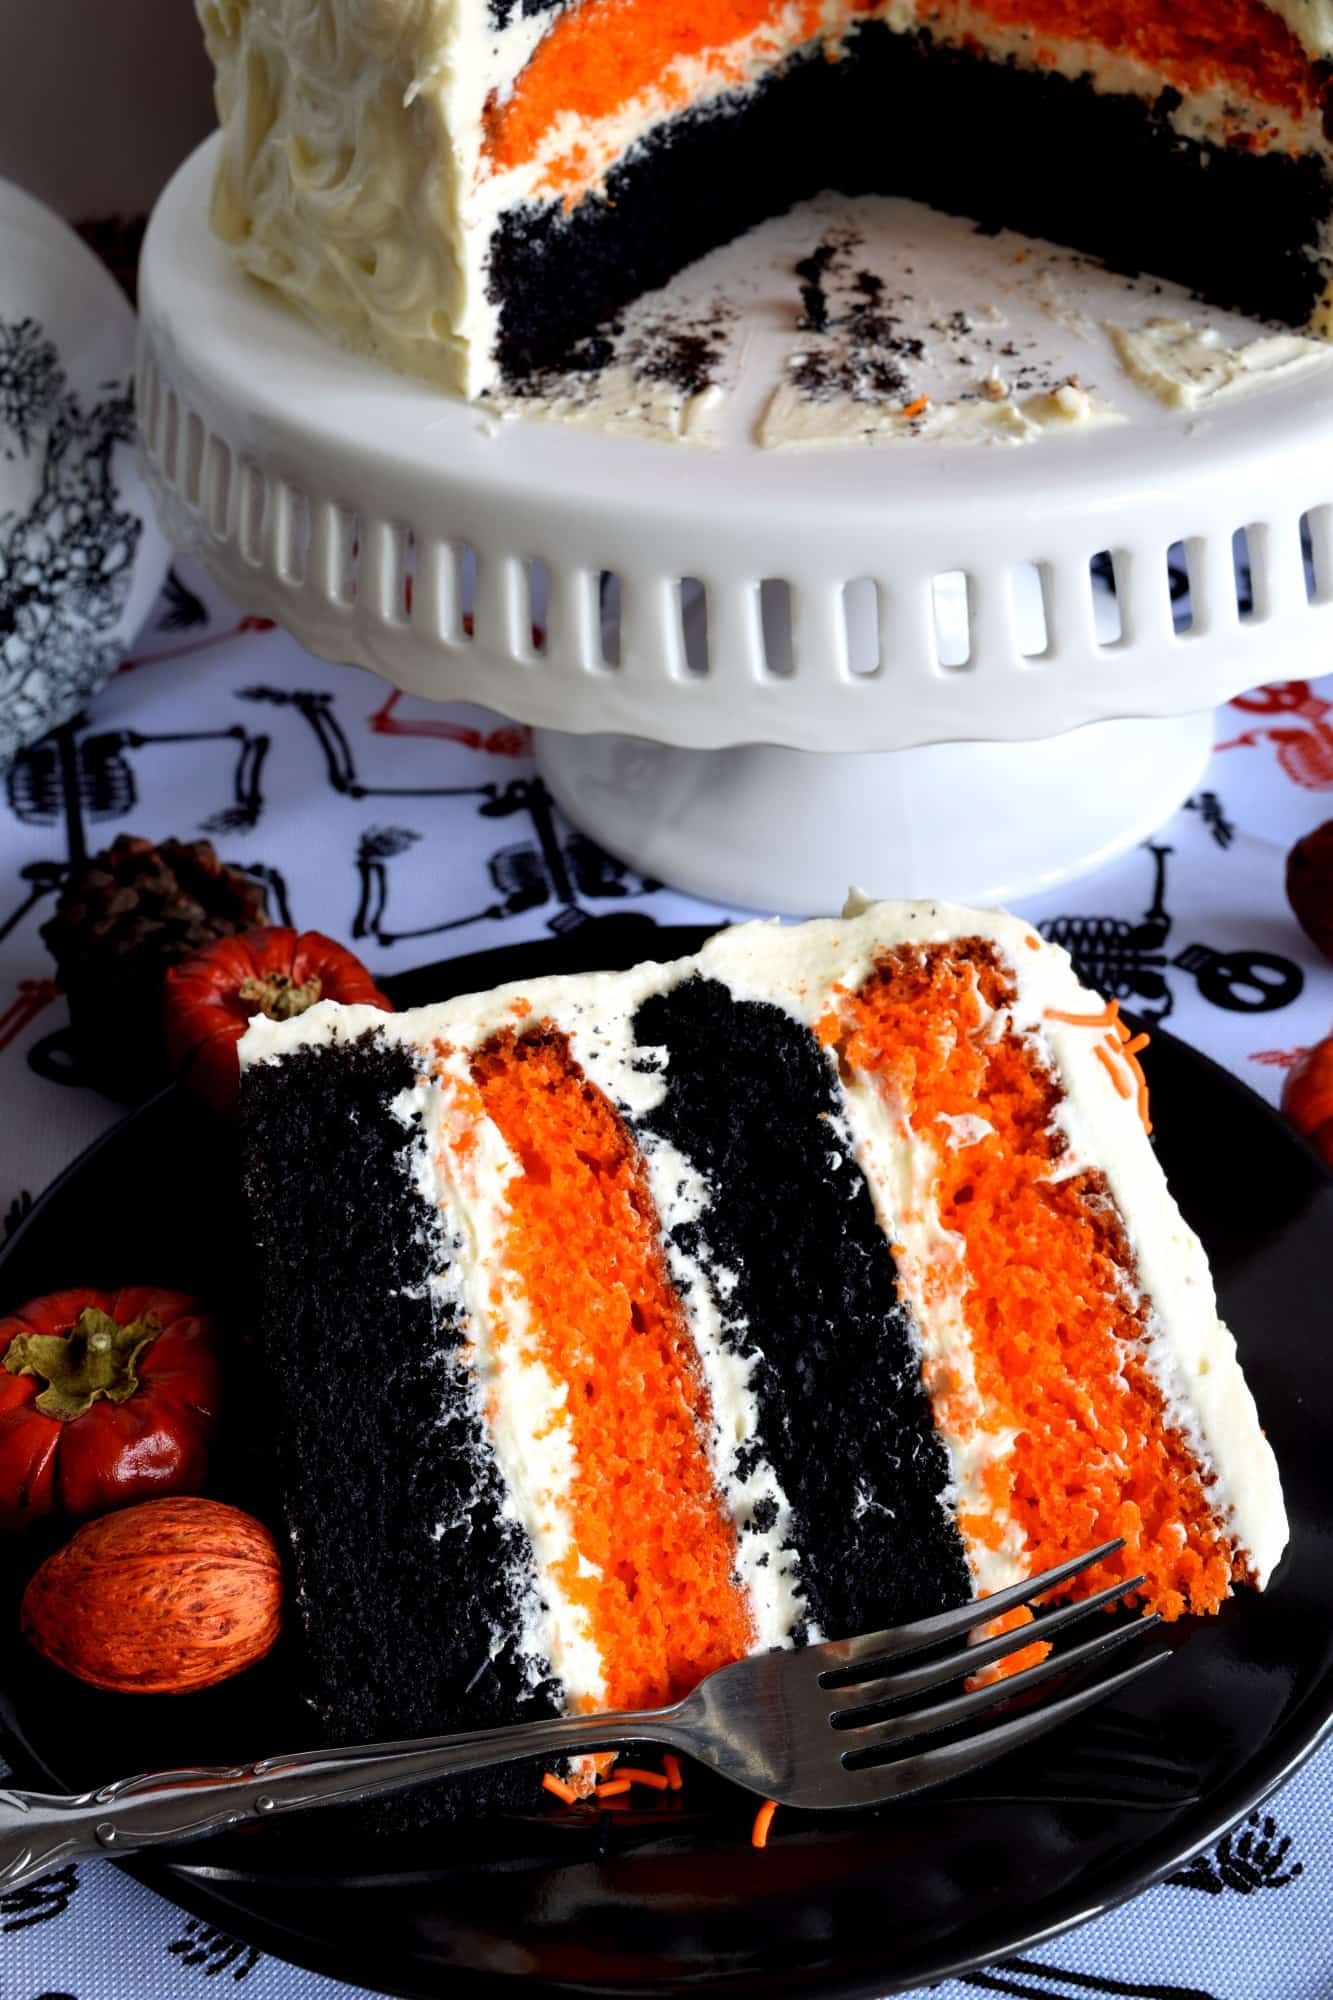
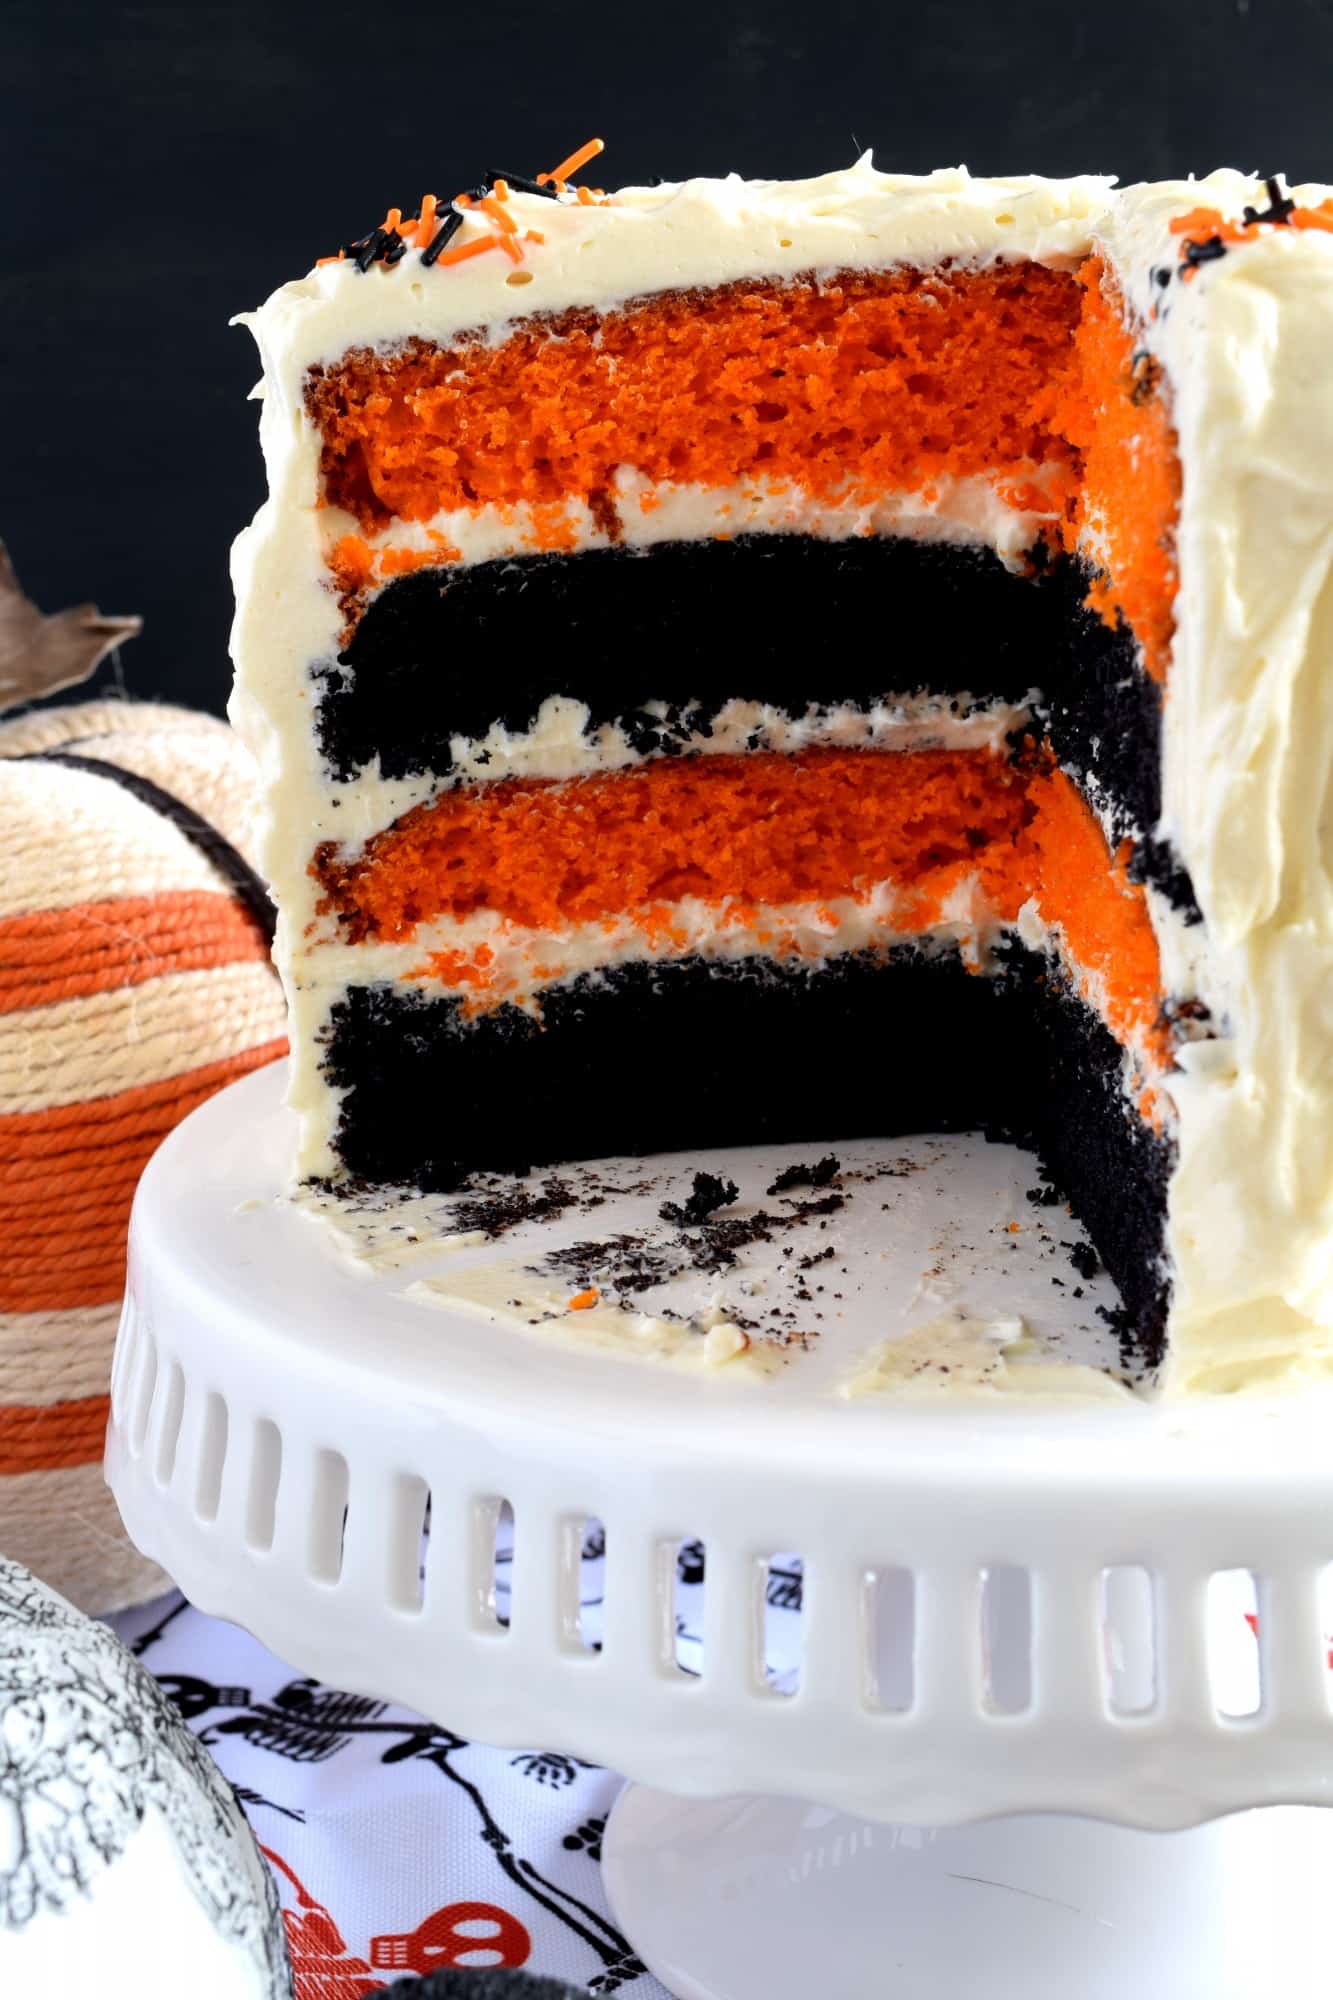
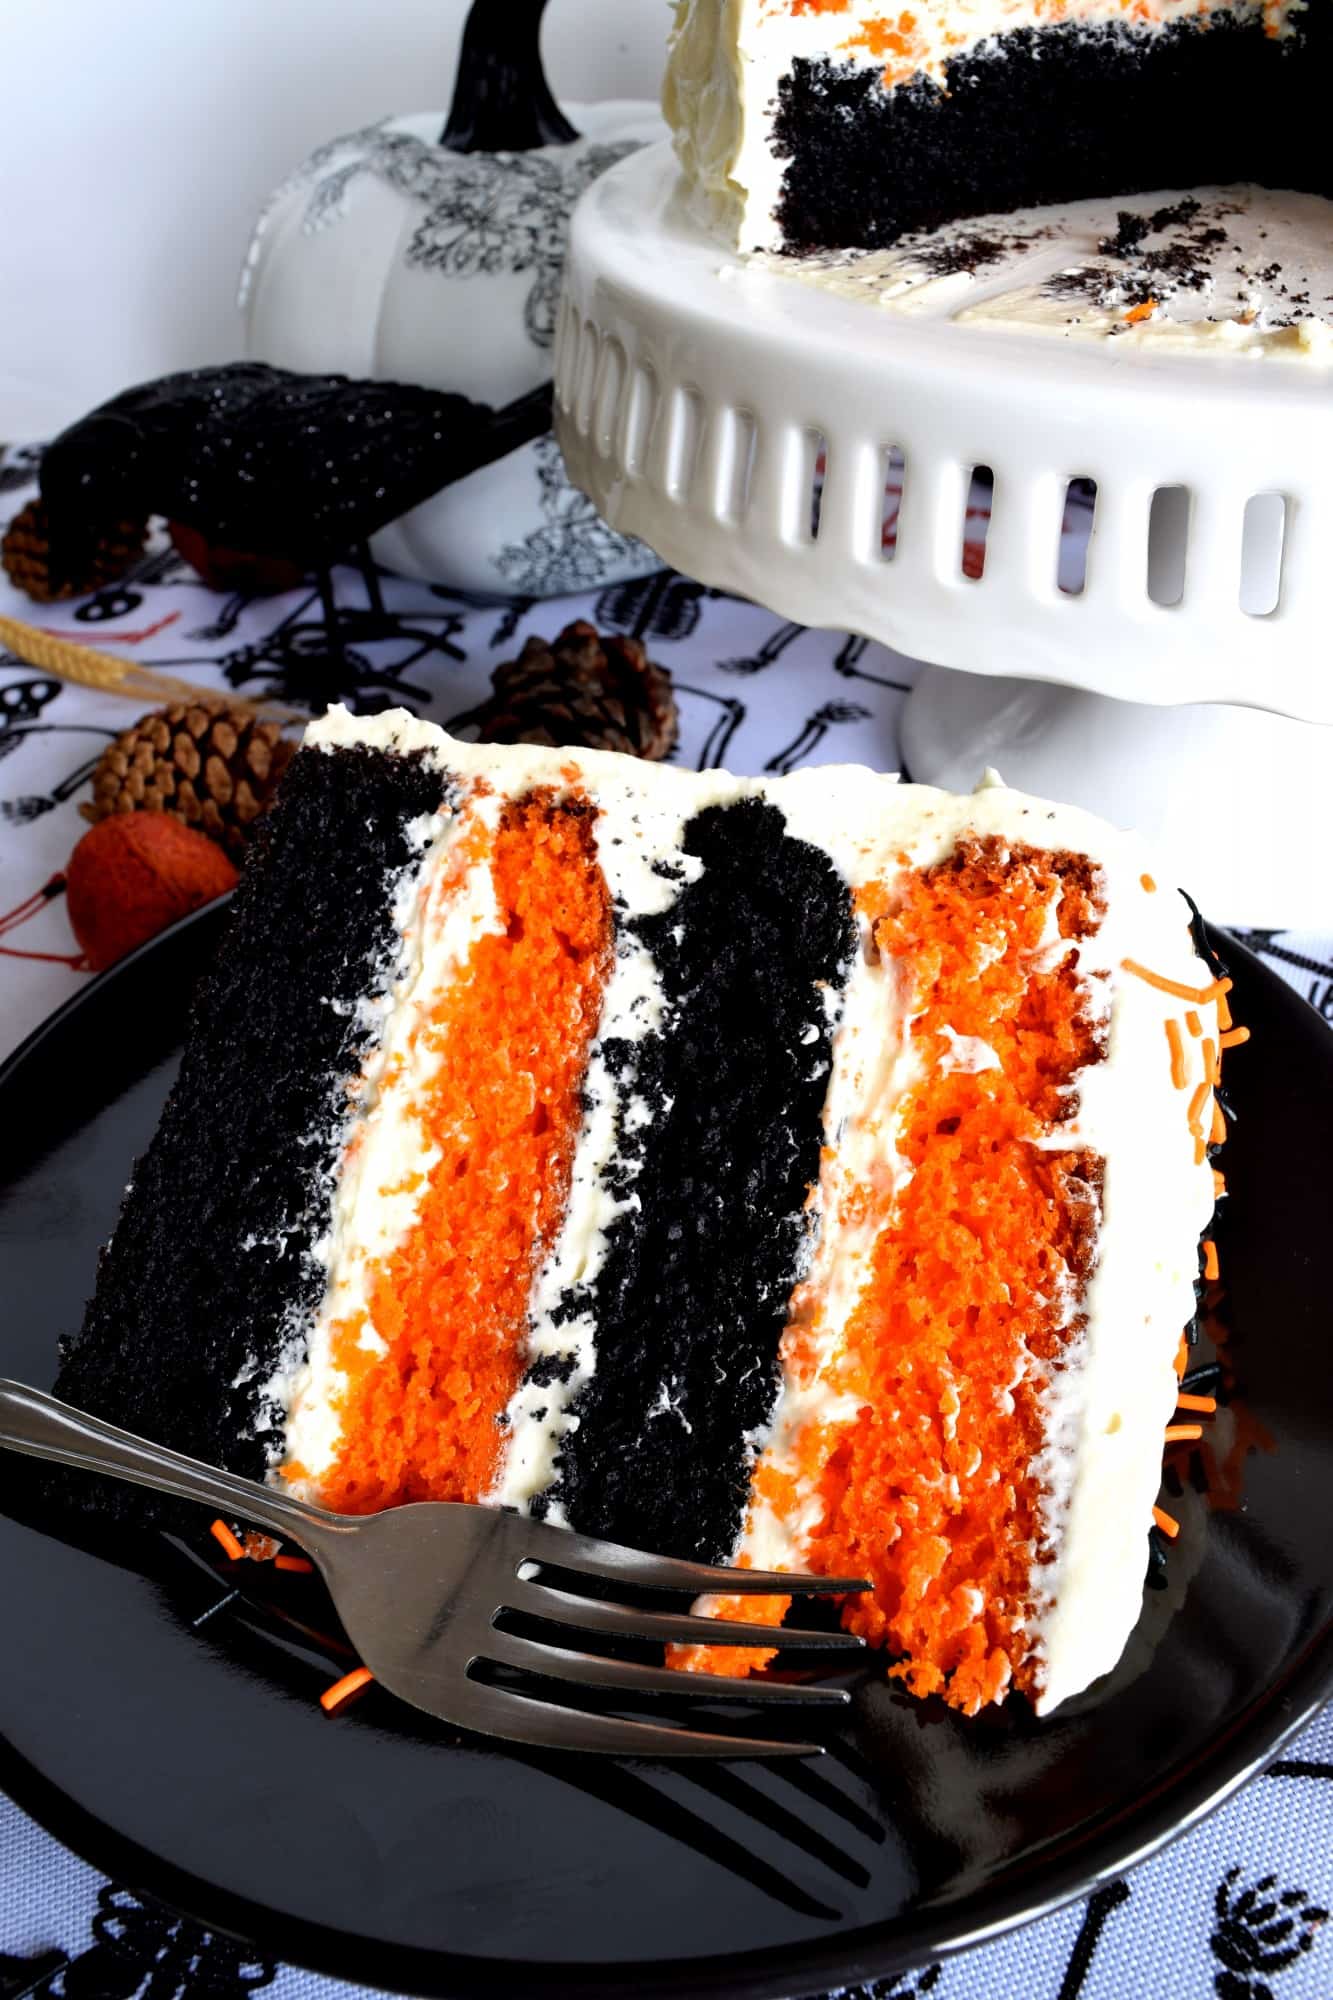
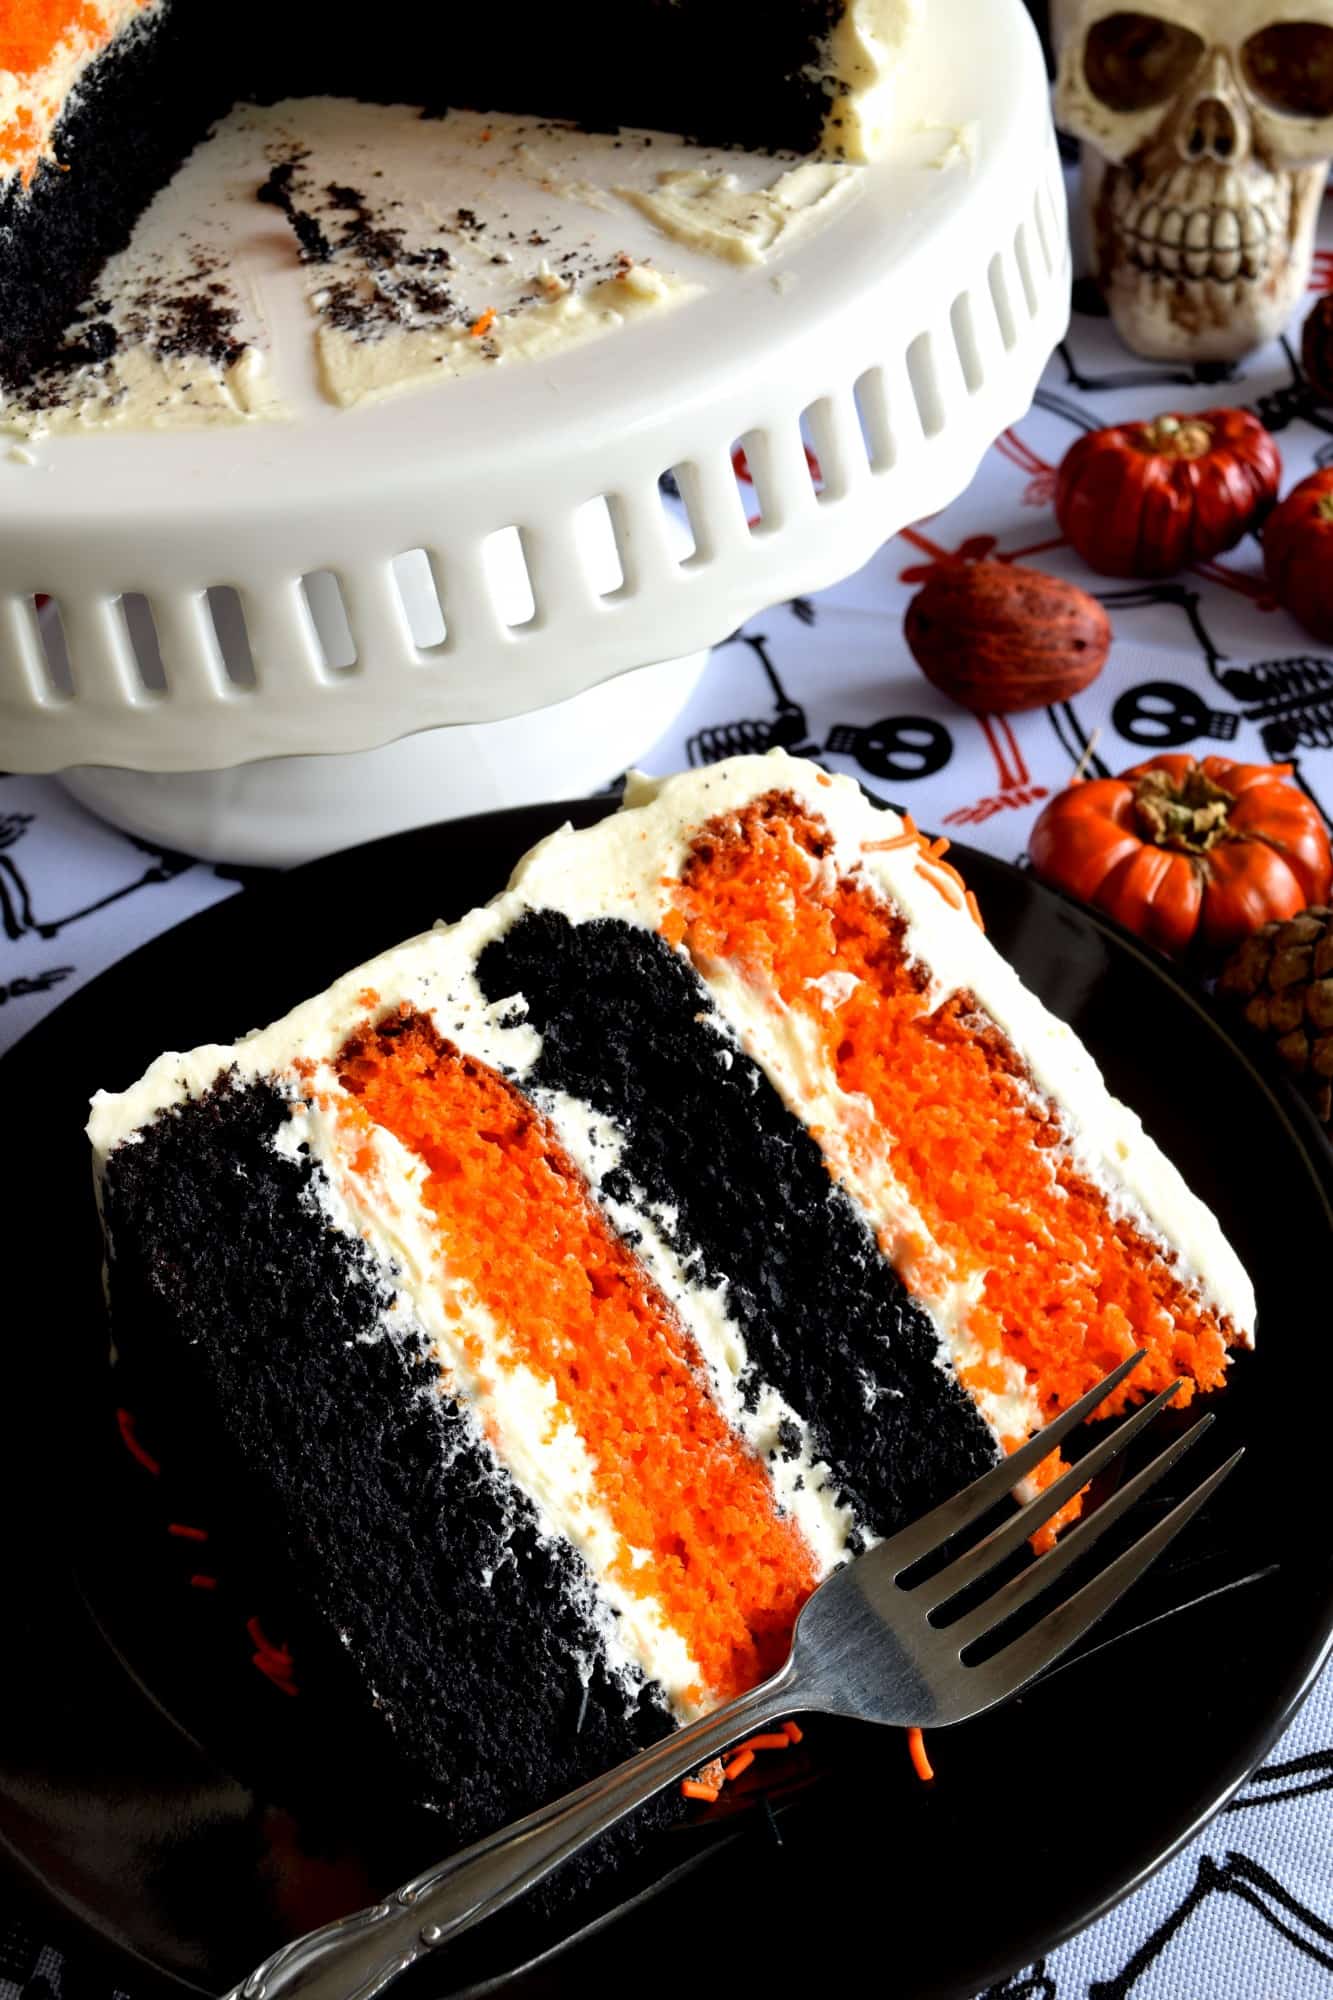
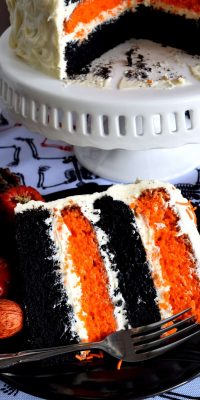
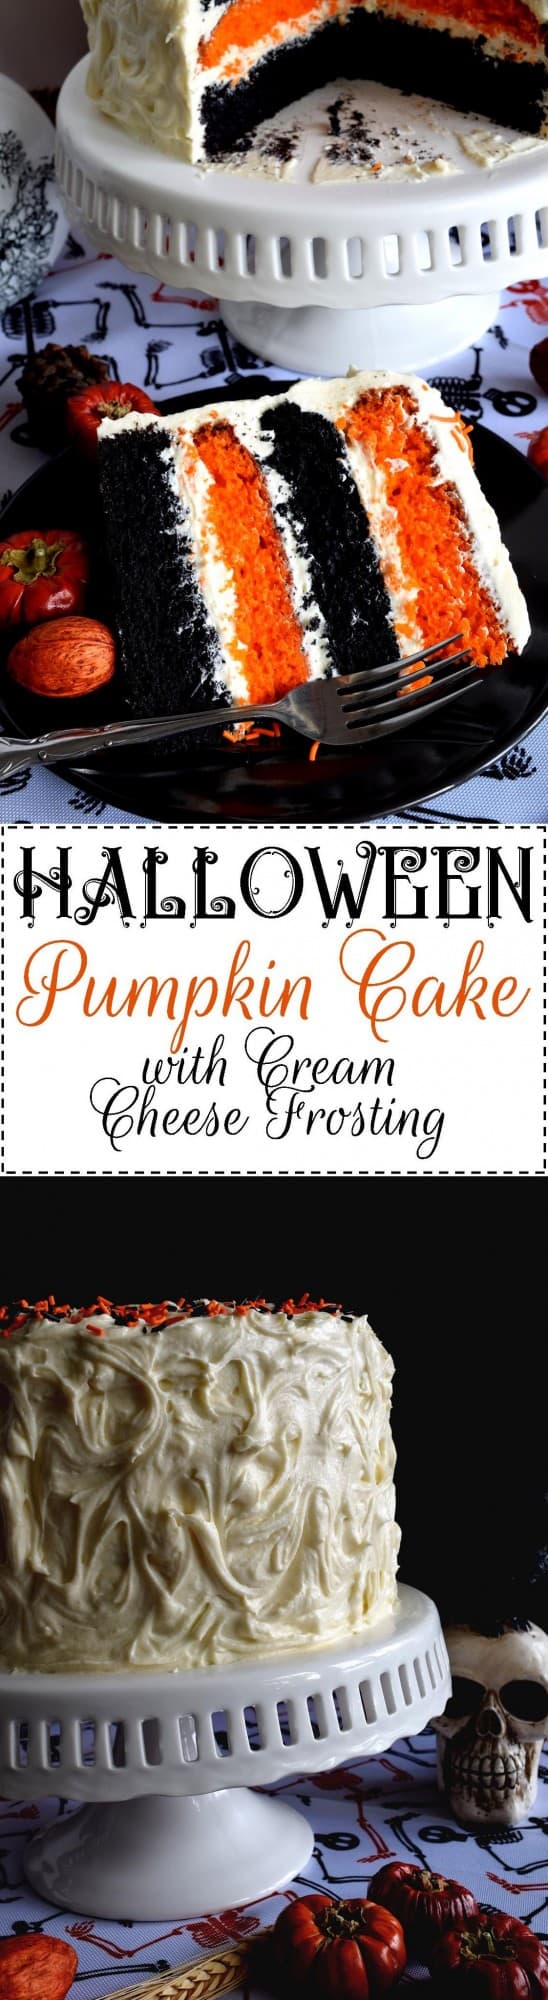
What’s Halloween without black and orange? This cake, although simple to make, looks super impressive. Halloween Pumpkin Cake with Cream Cheese Frosting will surely impress all of your favourite little trick or treater’s!

Not to mention the fact that the other moms and dads in your circle will think you spent hours and hours making this cake. They will wonder where you found the time and why everything you do looks so perfect. They’ll turn up their nose at you and call you names behind your back.
They’ll talk and whisper about you to the other parents. Why? Because you’re perfect and a goody two shoes, but who cares? You made this awesome cake and still had time to treat yourself to a secret indulgence which nobody ever has to know about.
You start to notice the other moms and dads avoiding you at day care drop off and pick up. And, forget about sitting with the other parents at school talent shows or football games. You’re now an outcast; an evil person who has way too much time and lives a perfect social media worthy lifestyle.
Okay, so this post is starting to read something like a scene out of the movie Mean Girls, so I digress. The focus here is this beautiful cake, not my secret desire to author books geared toward teenage girls about high school jealousy versus popularity.
The truth be told, the scenario above could be nothing further from the truth. This cake is huge, and in my humble opinion, it’s pretty damn impressive too, but it’s completely easy and doable.
Trust me, Dear Reader; my cake decorating skills are horrible! I don’t even know how I pulled this one off, but I’ll walk you through it and let you in on my cake decorating secrets.
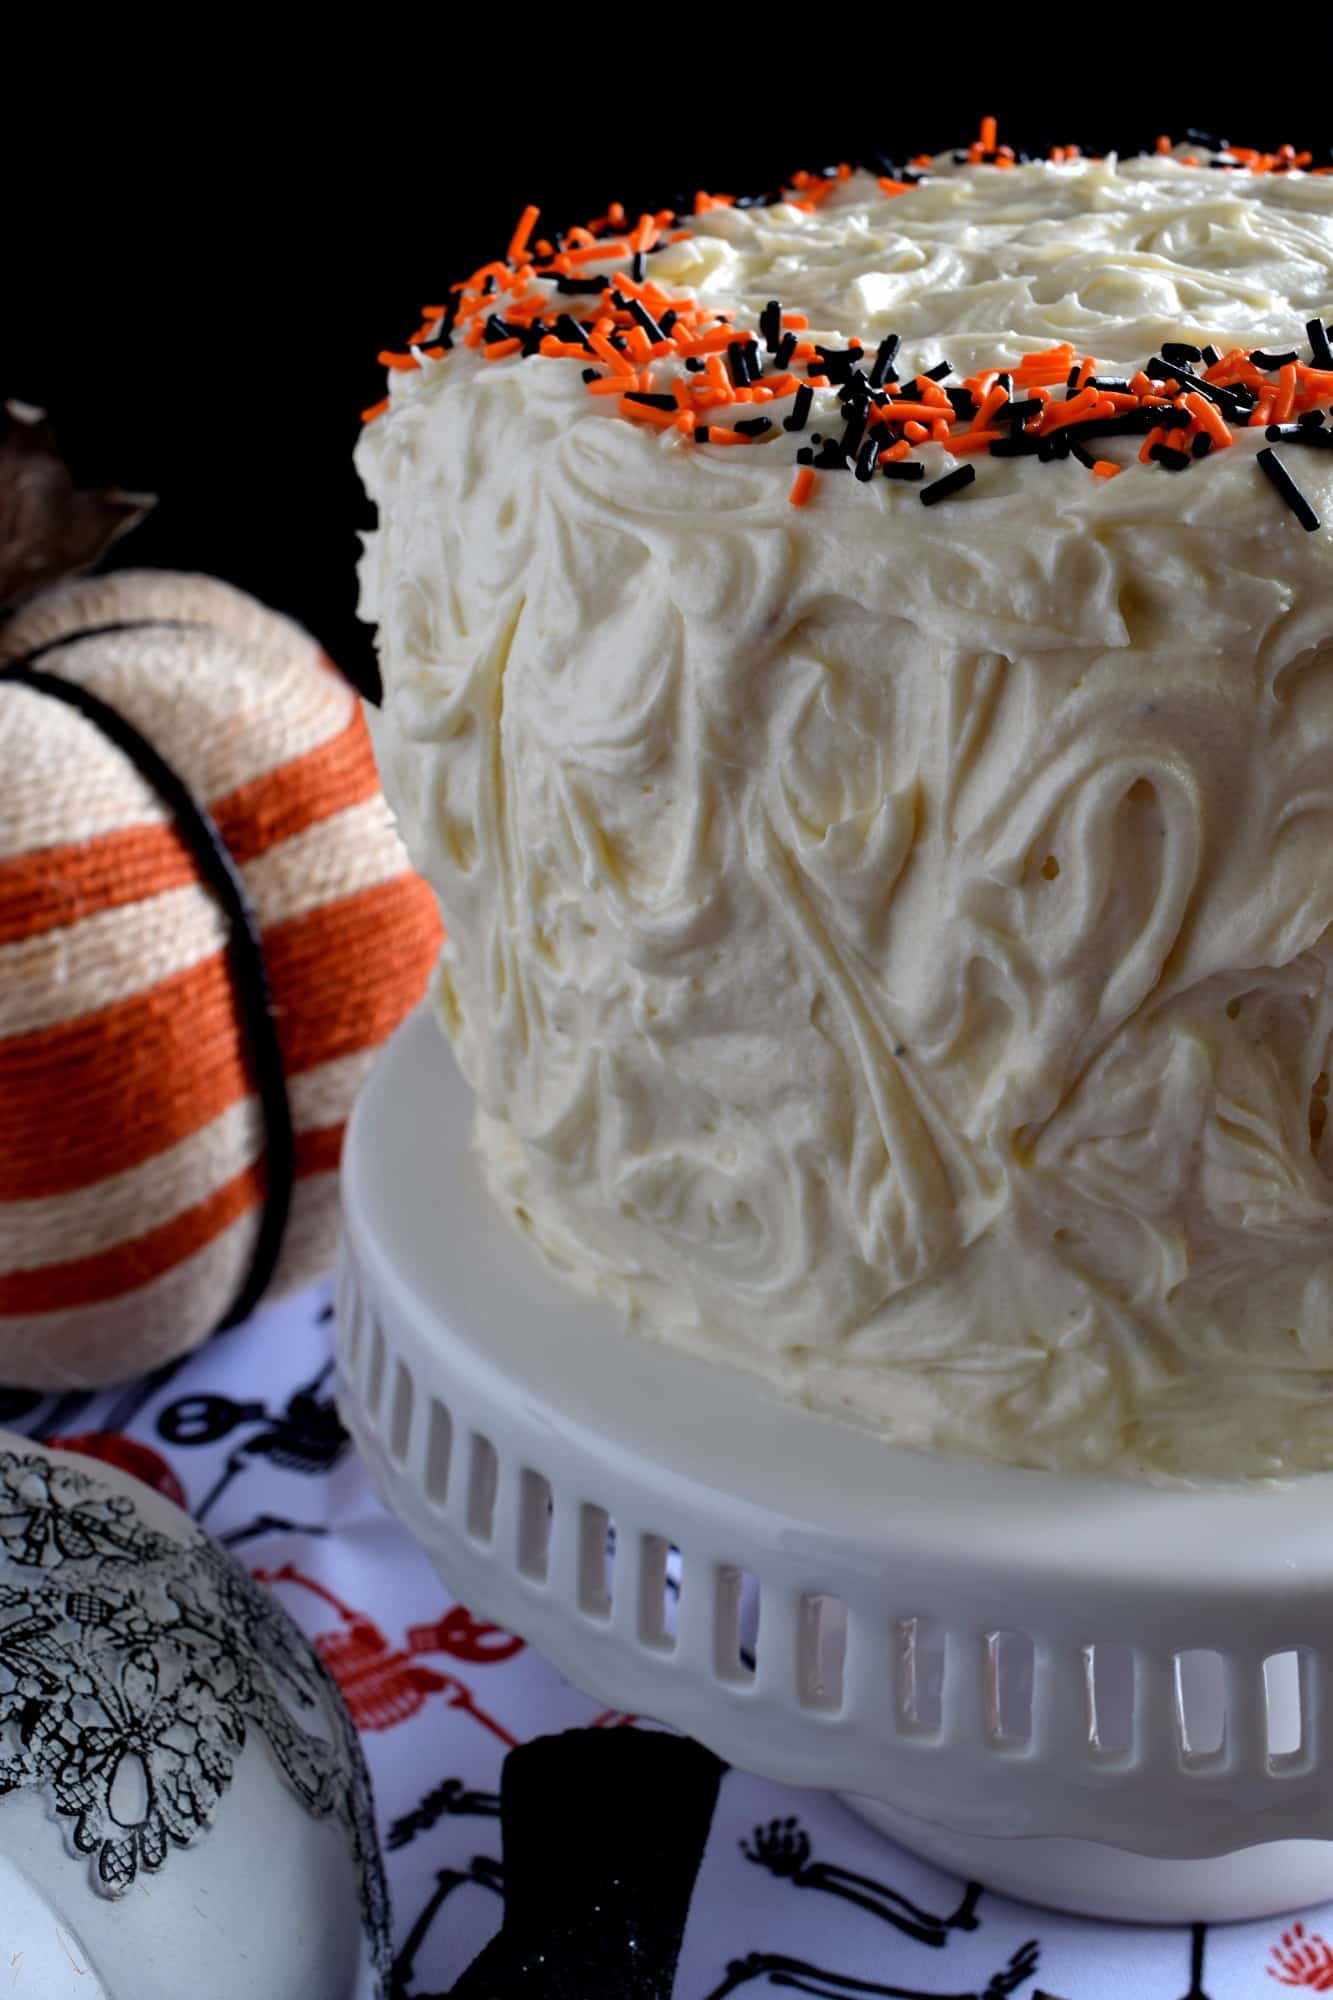
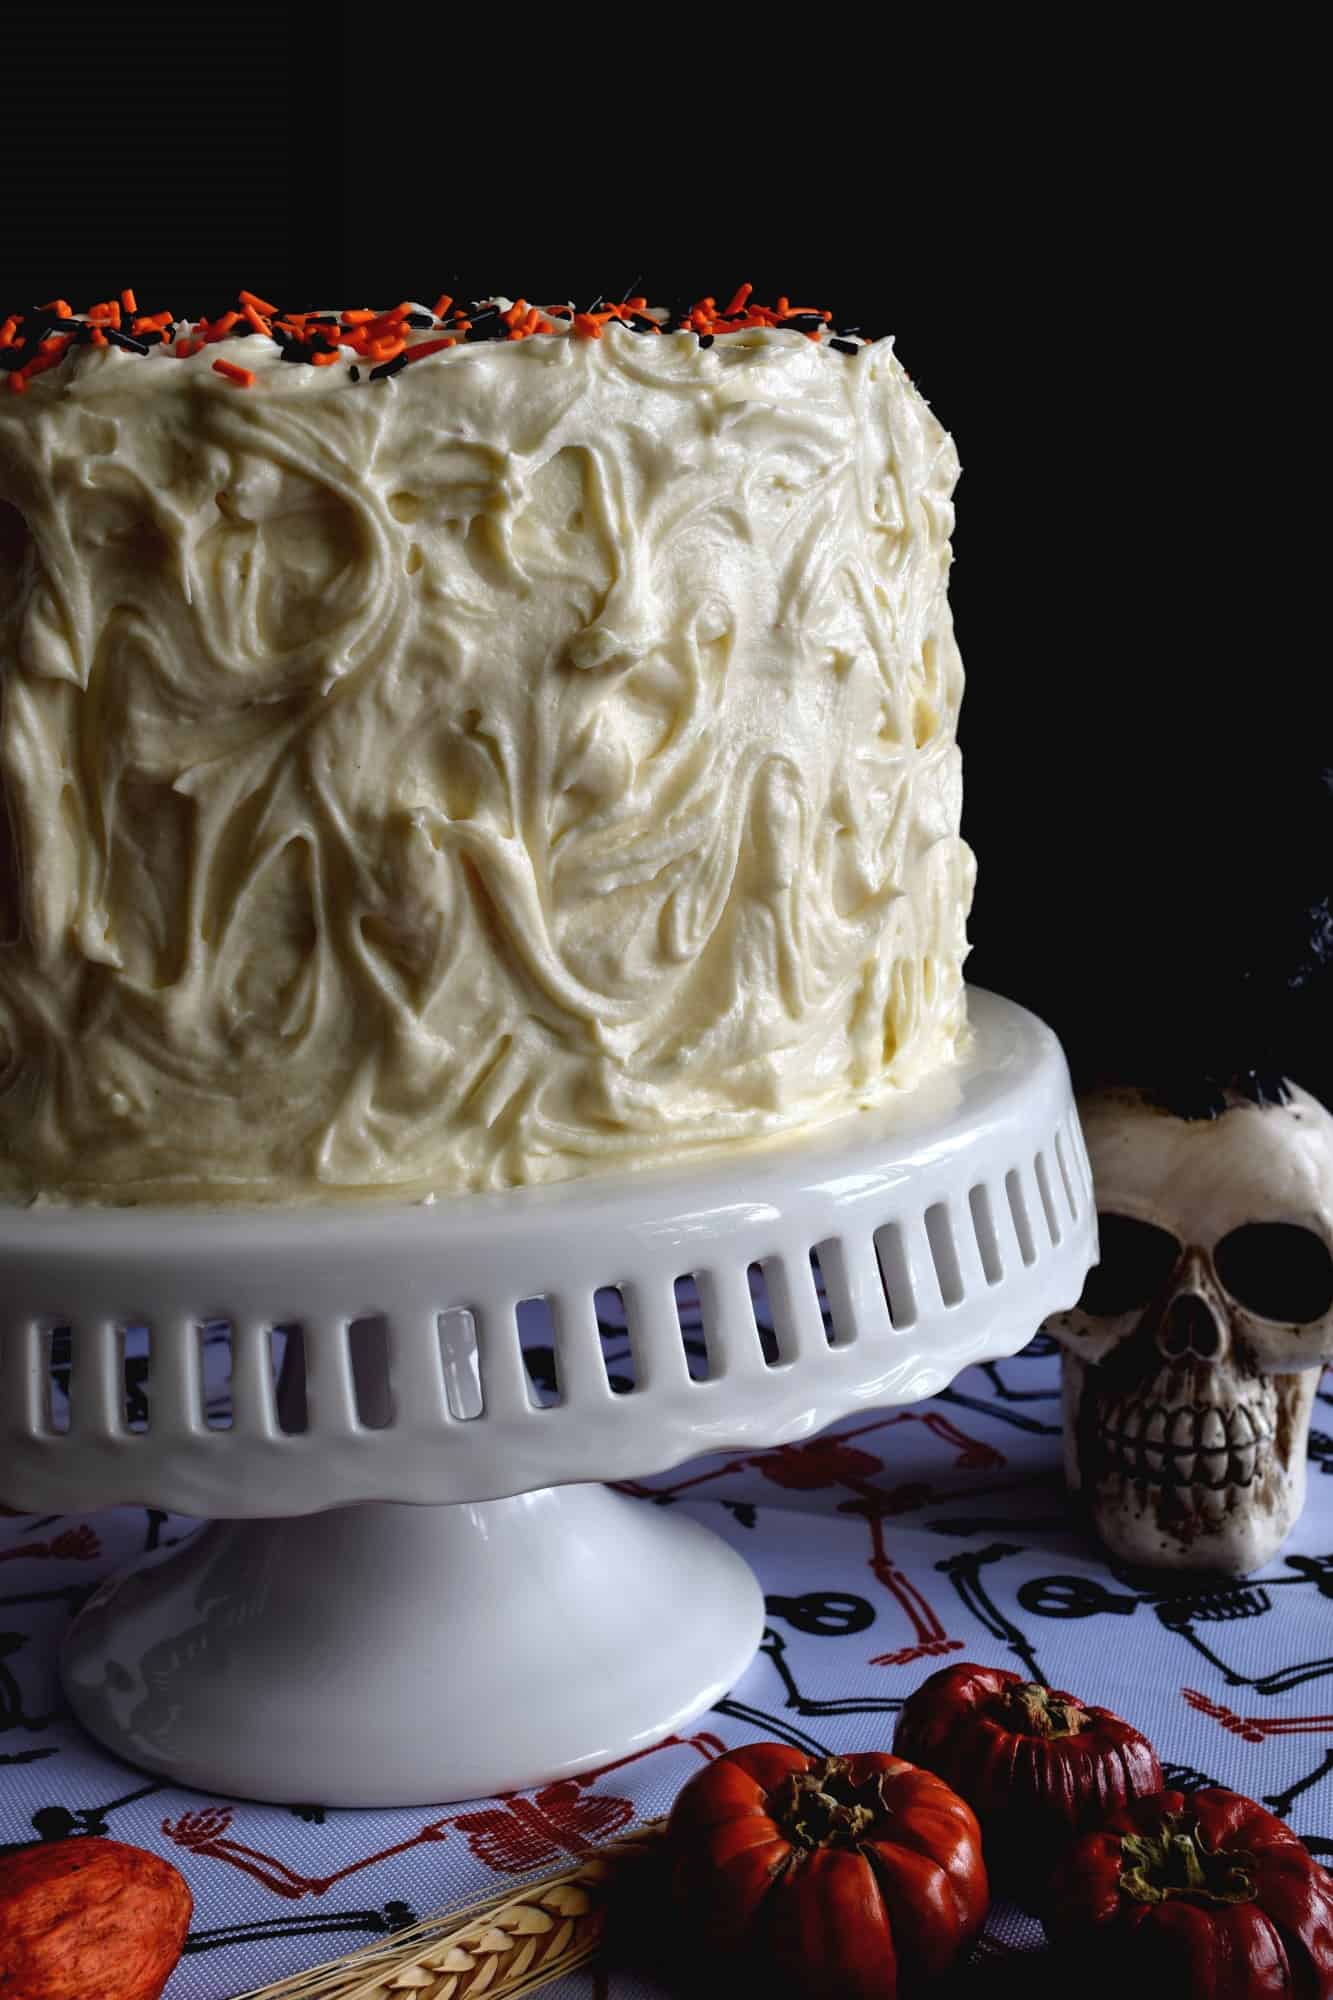
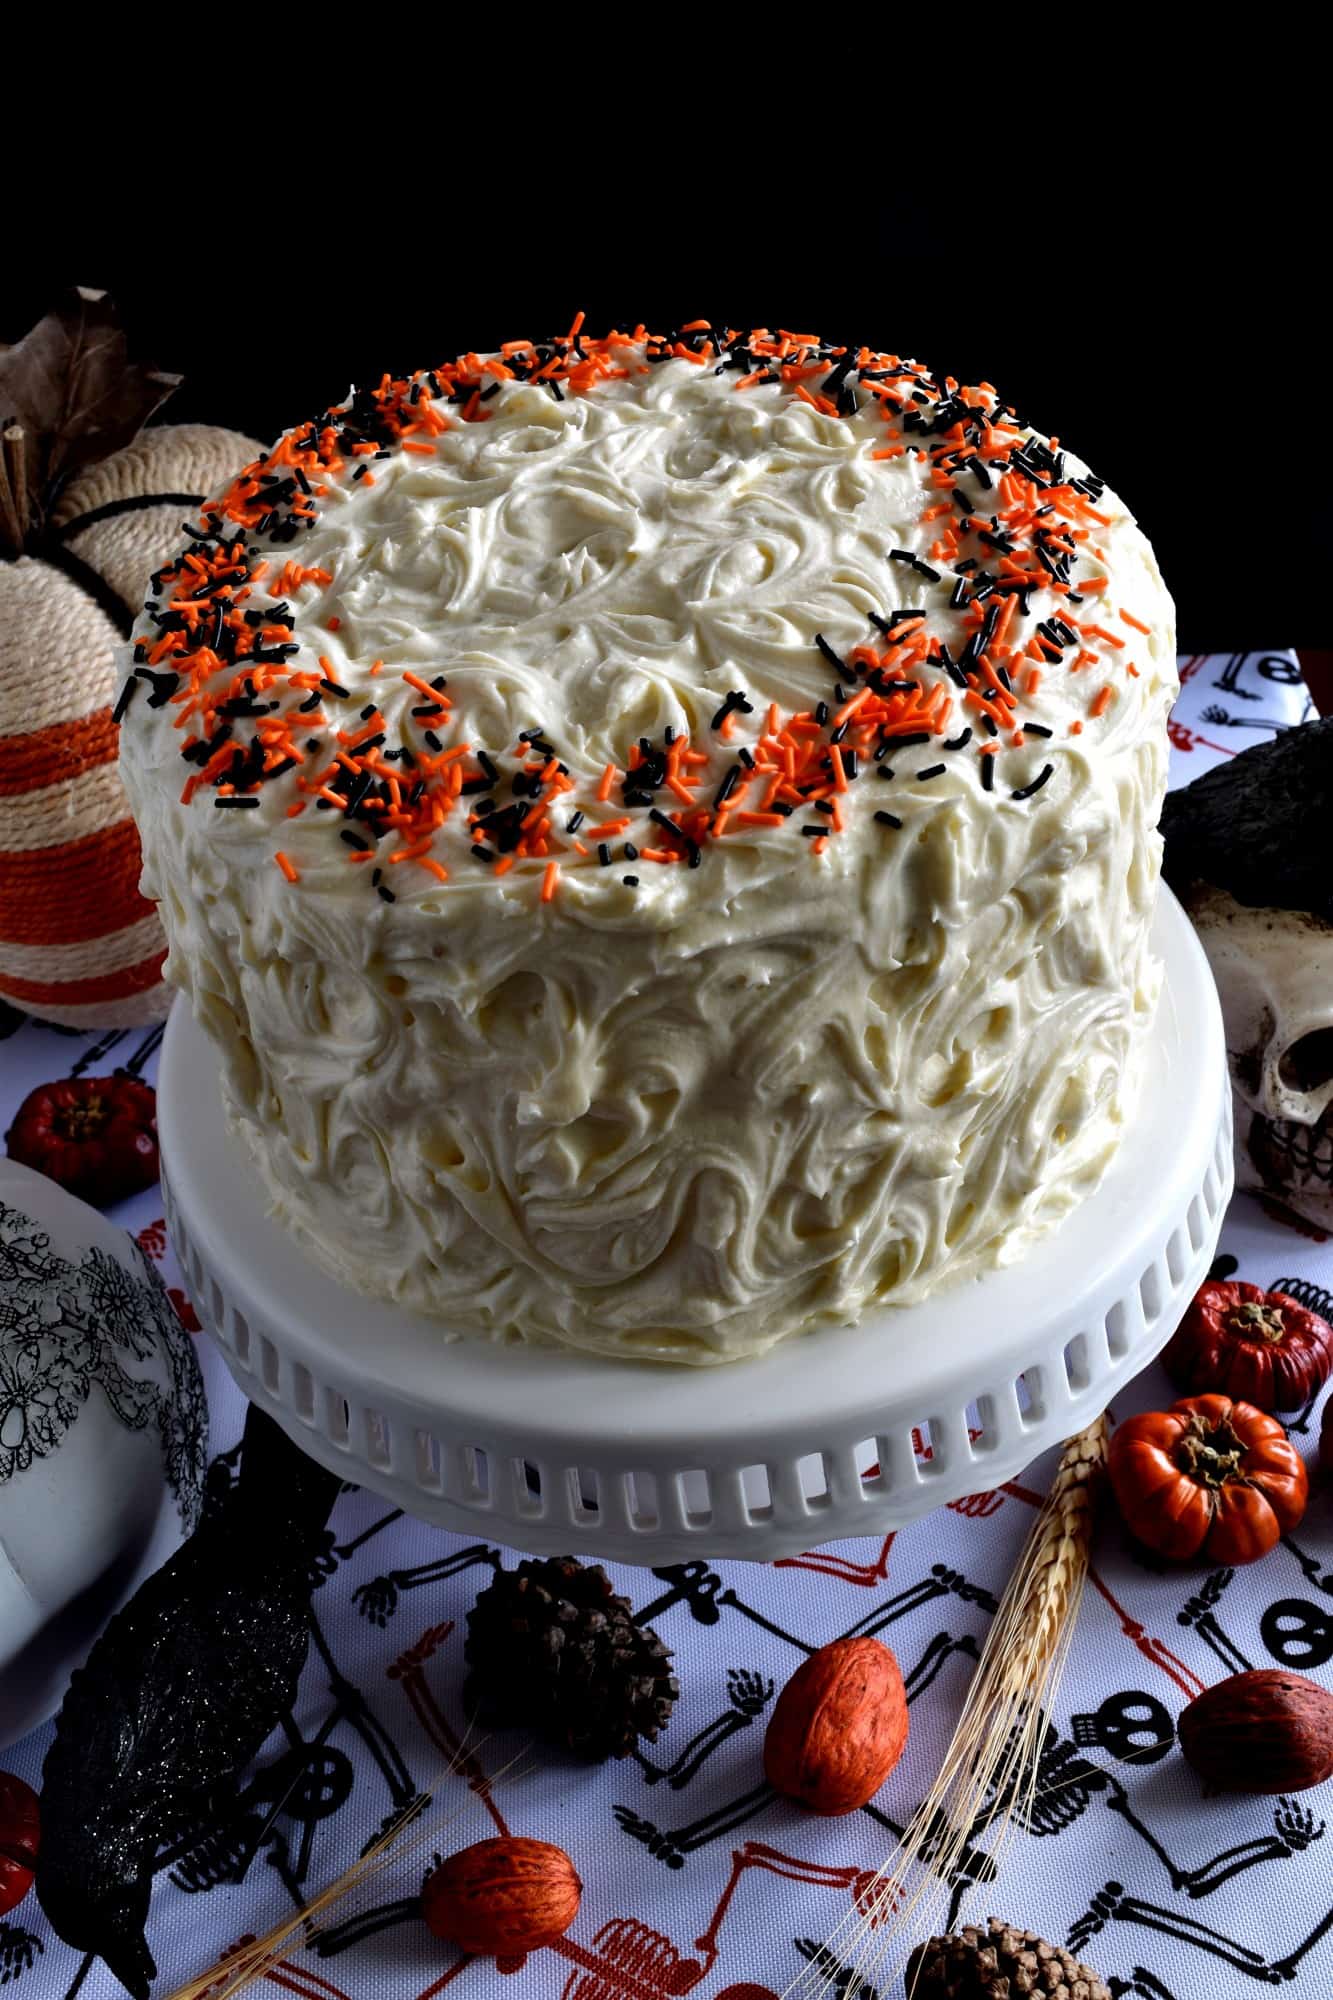
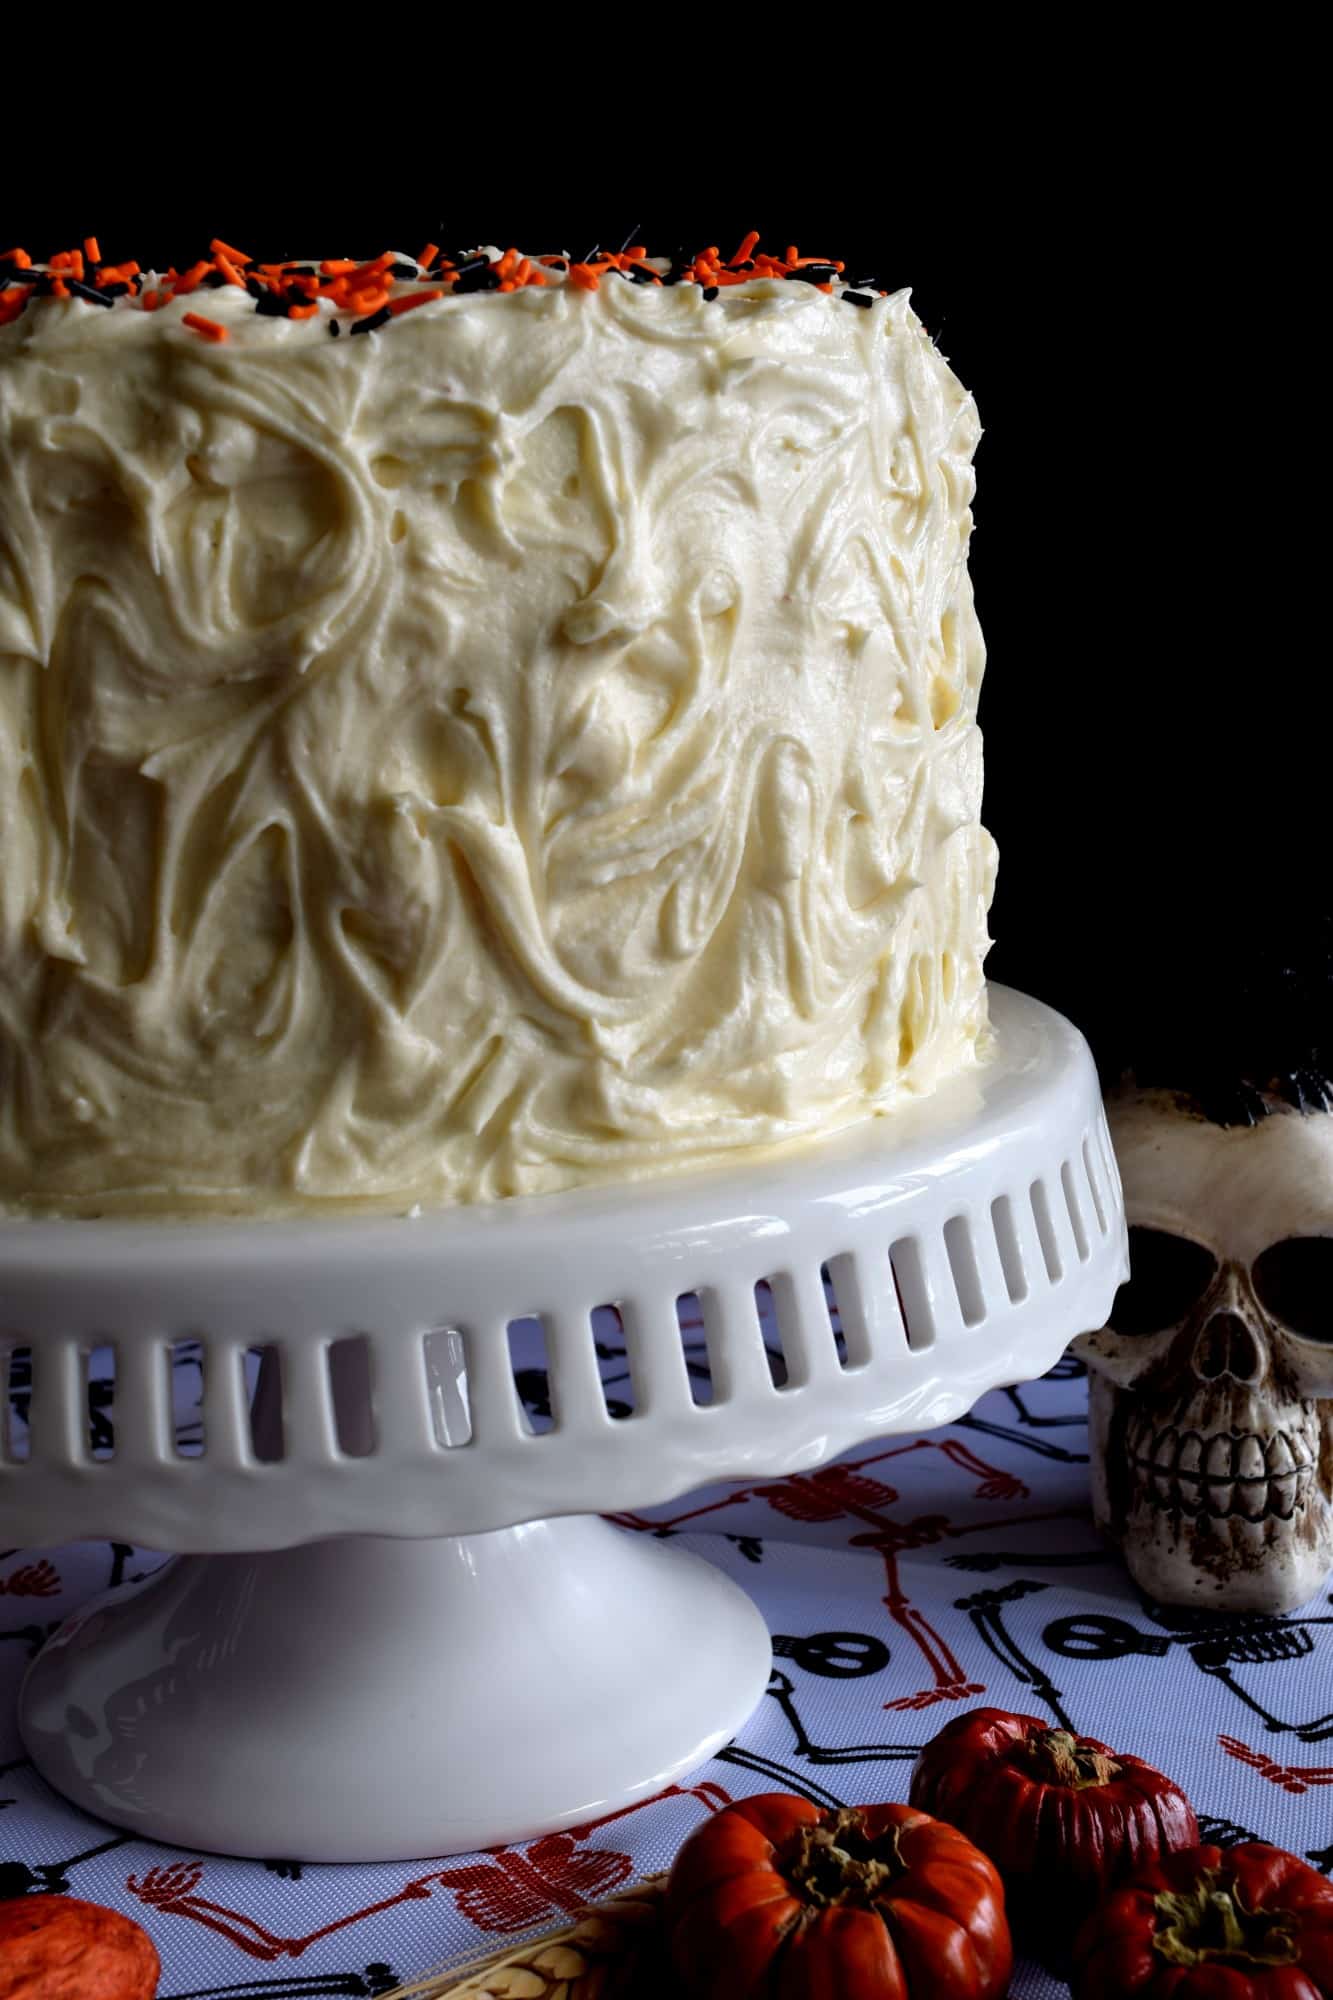
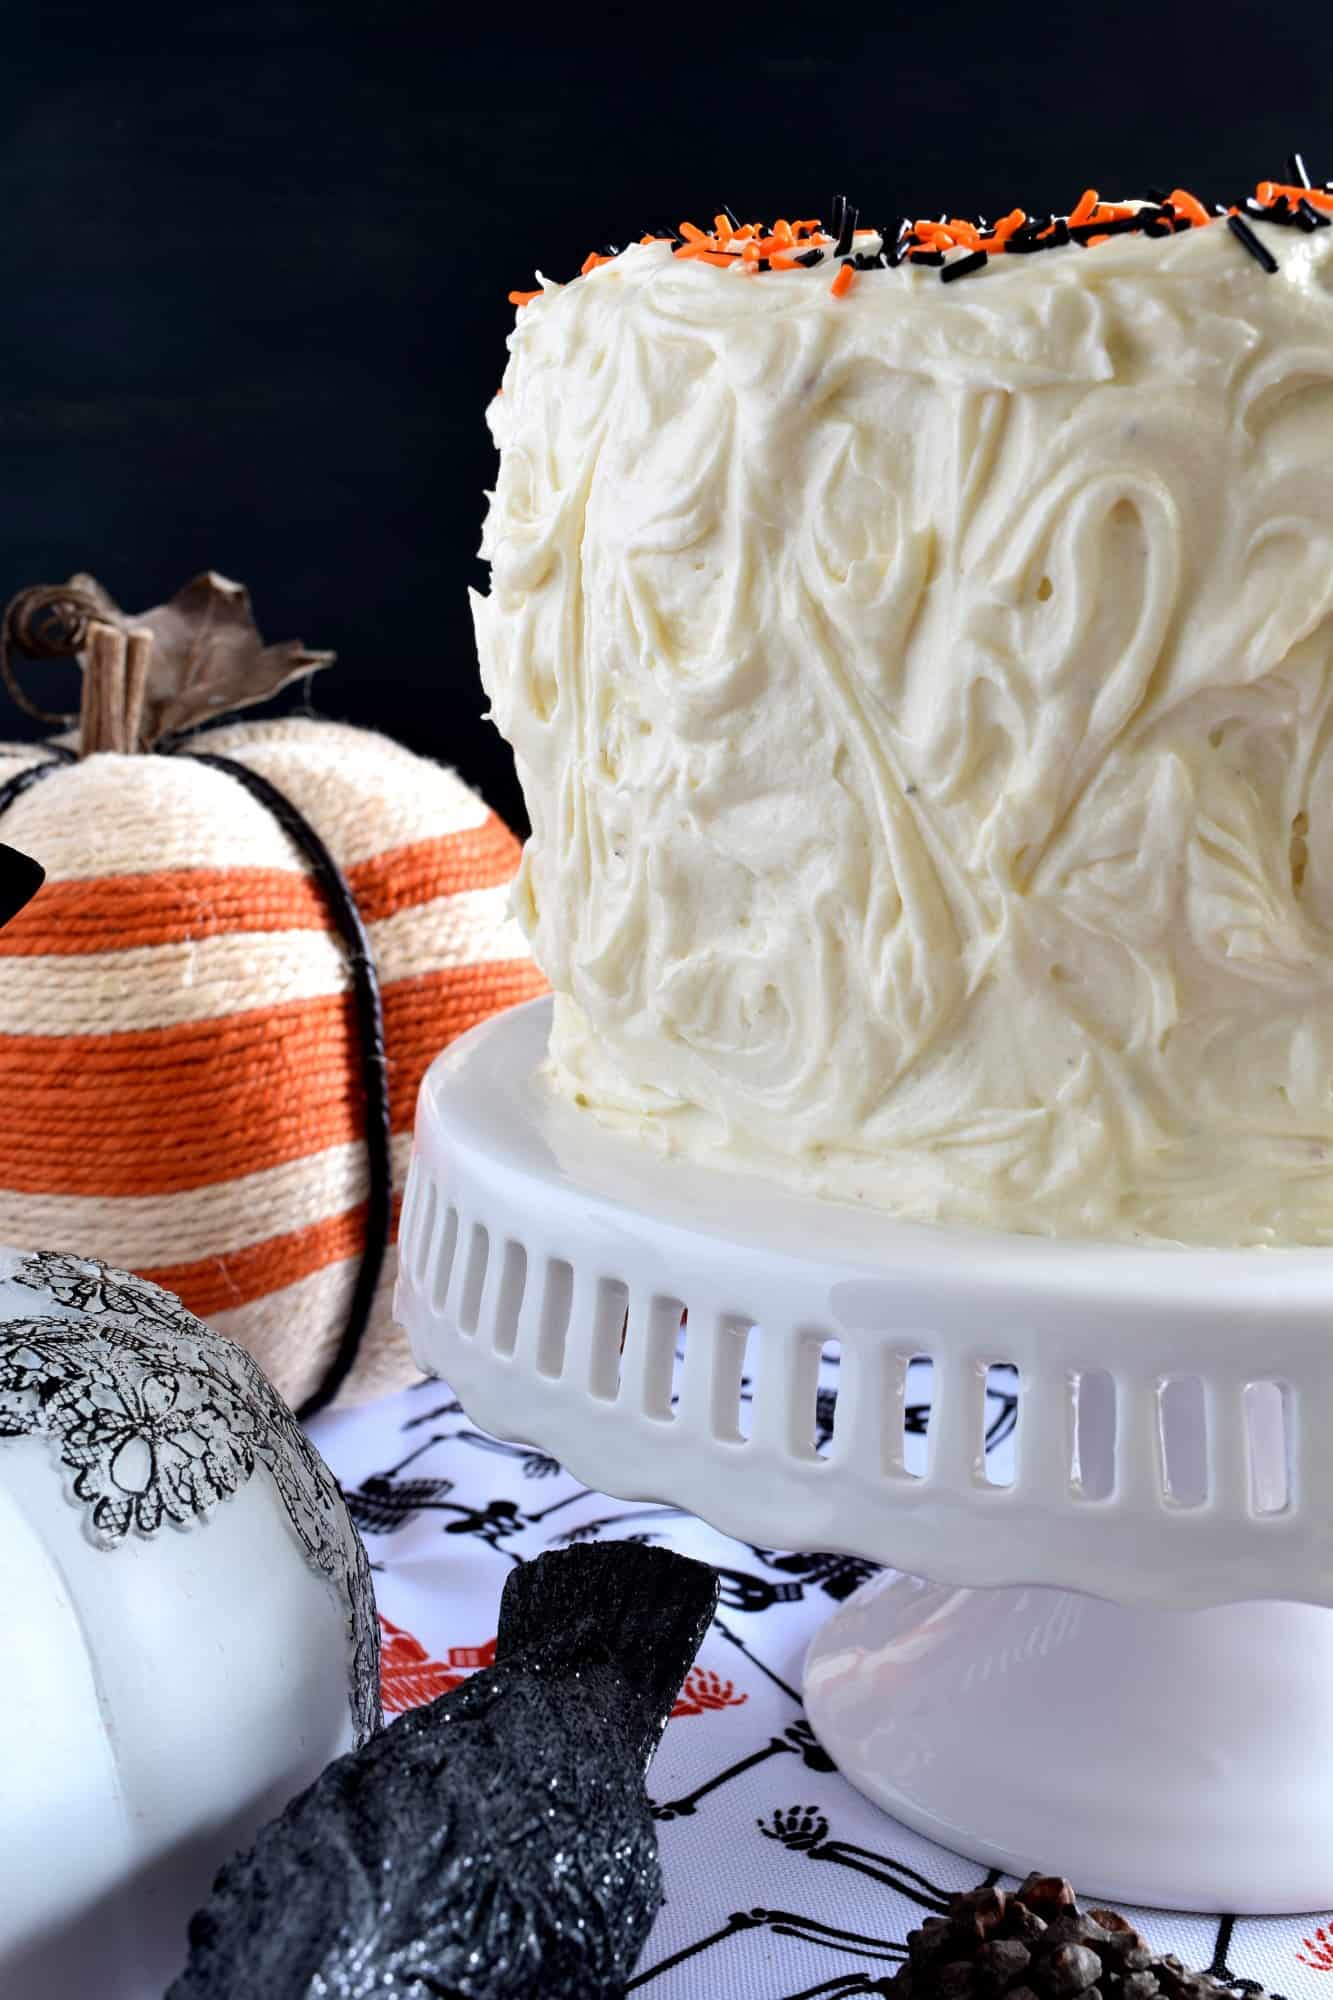
Are you ready for this? I wanted to create an outer layer of frosting that looked swirly and wavy – think of the tail end of a ghost in flight. That’s what I wanted for this cake. I was able to achieve the look (I think!) but smearing the icing on in a thick layer using an offset spatula.
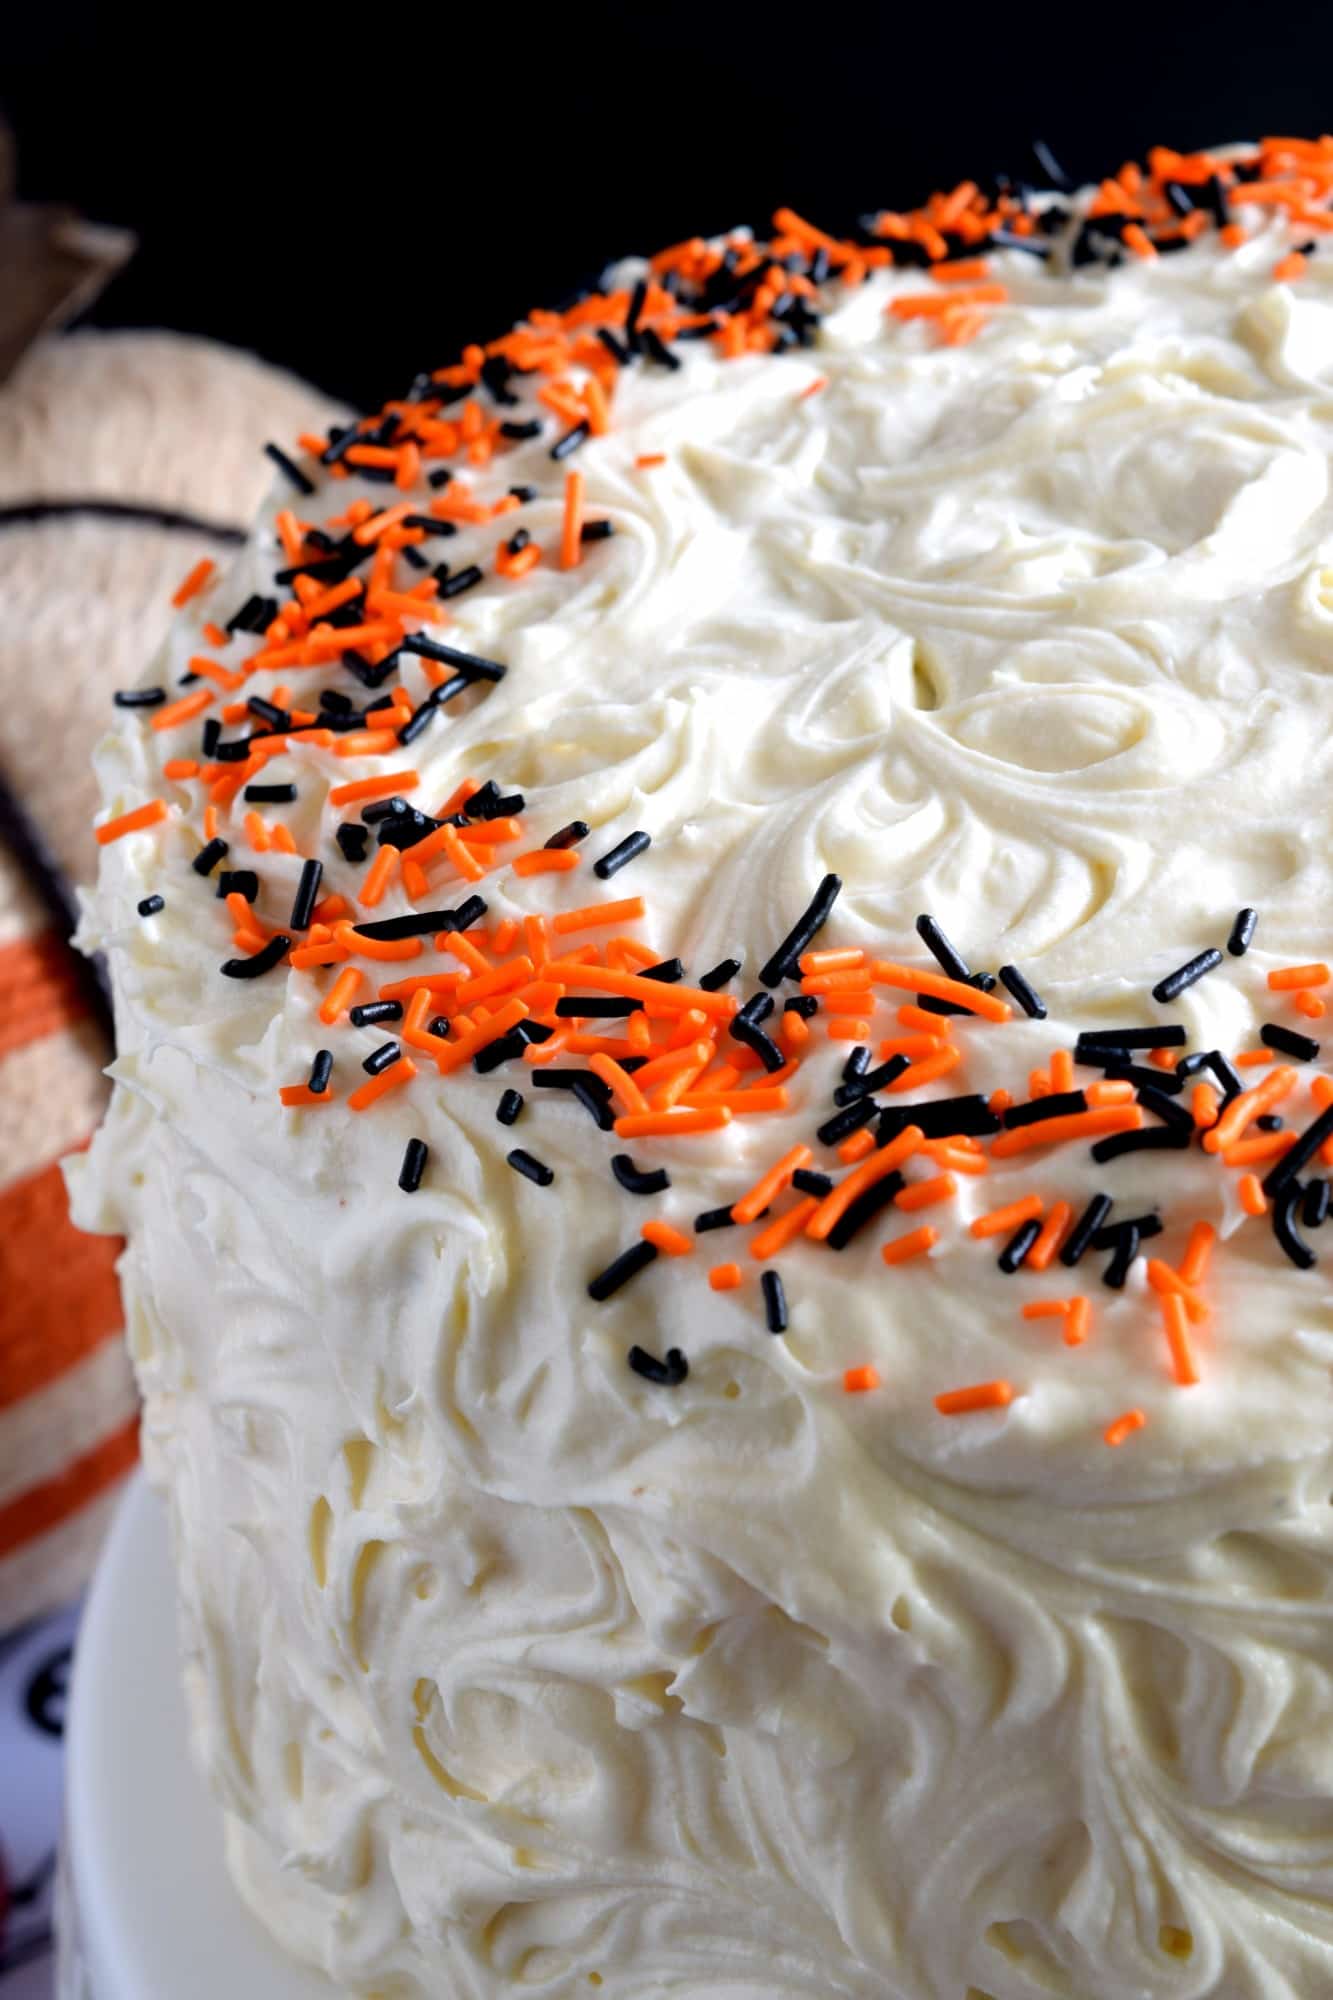
And then… I used Q-tips. Yep! Q-tips that I moistened by running the cotton end under water to get rid of any loose fibers. Then, I used a paper towel to gently squeeze out the water before dragging the cotton tip through the icing in a figure eight/random pattern.
Doesn’t seem too impressive now, does it? Sometimes, you’ve just got to work with what you have. And, even though I’m completely blessed in my life, and I consider myself to have a few talents, cake decorating is certainly not one of them, so I just work through the shakiness and the unevenness with what I have.
So, there’s no reason you can’t do this too. Trust me – you’ll impress everyone with this cake. It’s pretty, delightfully bright and Halloween-y, and super, super tasty!
Let’s get to the recipe so you can see just how easy this cake can be!
In a hurry? Save this recipe to your Pinterest board for quick and easy reference! Click HERE!
Halloween Pumpkin Cake with Cream Cheese Frosting
Ingredients
For the Cake:
- 1 cup butter, room temperature
- 1 1/2 cups white sugar
- 4 large eggs
- 2 tablespoons pumpkin spice extract
- 2 3/4 cups all purpose flour
- 3 tablespoons baking powder
- 1/2 teaspoon salt
- 1 cup milk
- Black food colouring
- Orange food colouring
For the Frosting:
- 1 cup salted butter, softened
- 16 ounces cream cheese, softened
- 6 cups confectioner's sugar
- 2 teaspoons pumpkin spice extract
Optional:
- Candy sprinkles, orange and black or your choice of colour
Instructions
For the Cake
- Preheat oven to 350° Line two 8 or 9 inch cake pans with parchment paper (bottom and sides) or liberally grease pan and lightly coat with a dusting of flour. Set aside.
- In a large bowl, using a handheld mixer, mix together the butter and sugar on medium speed for 3 minutes.
- Add the eggs one at a time and blend well into the sugar and butter mixture.
- Next, add the pumpkin spice extract and mix into the batter.
- Scrape down the bowl and add the following ingredients in this order: flour, baking powder, and salt. Using the mixer, on low speed, gently blend the baking powder and salt into the flour - just a few seconds.
- Now, increase the speed on the mixer to medium and blend the flour into the batter just until the flour is incorporated.
- Add the milk and fully incorporate.
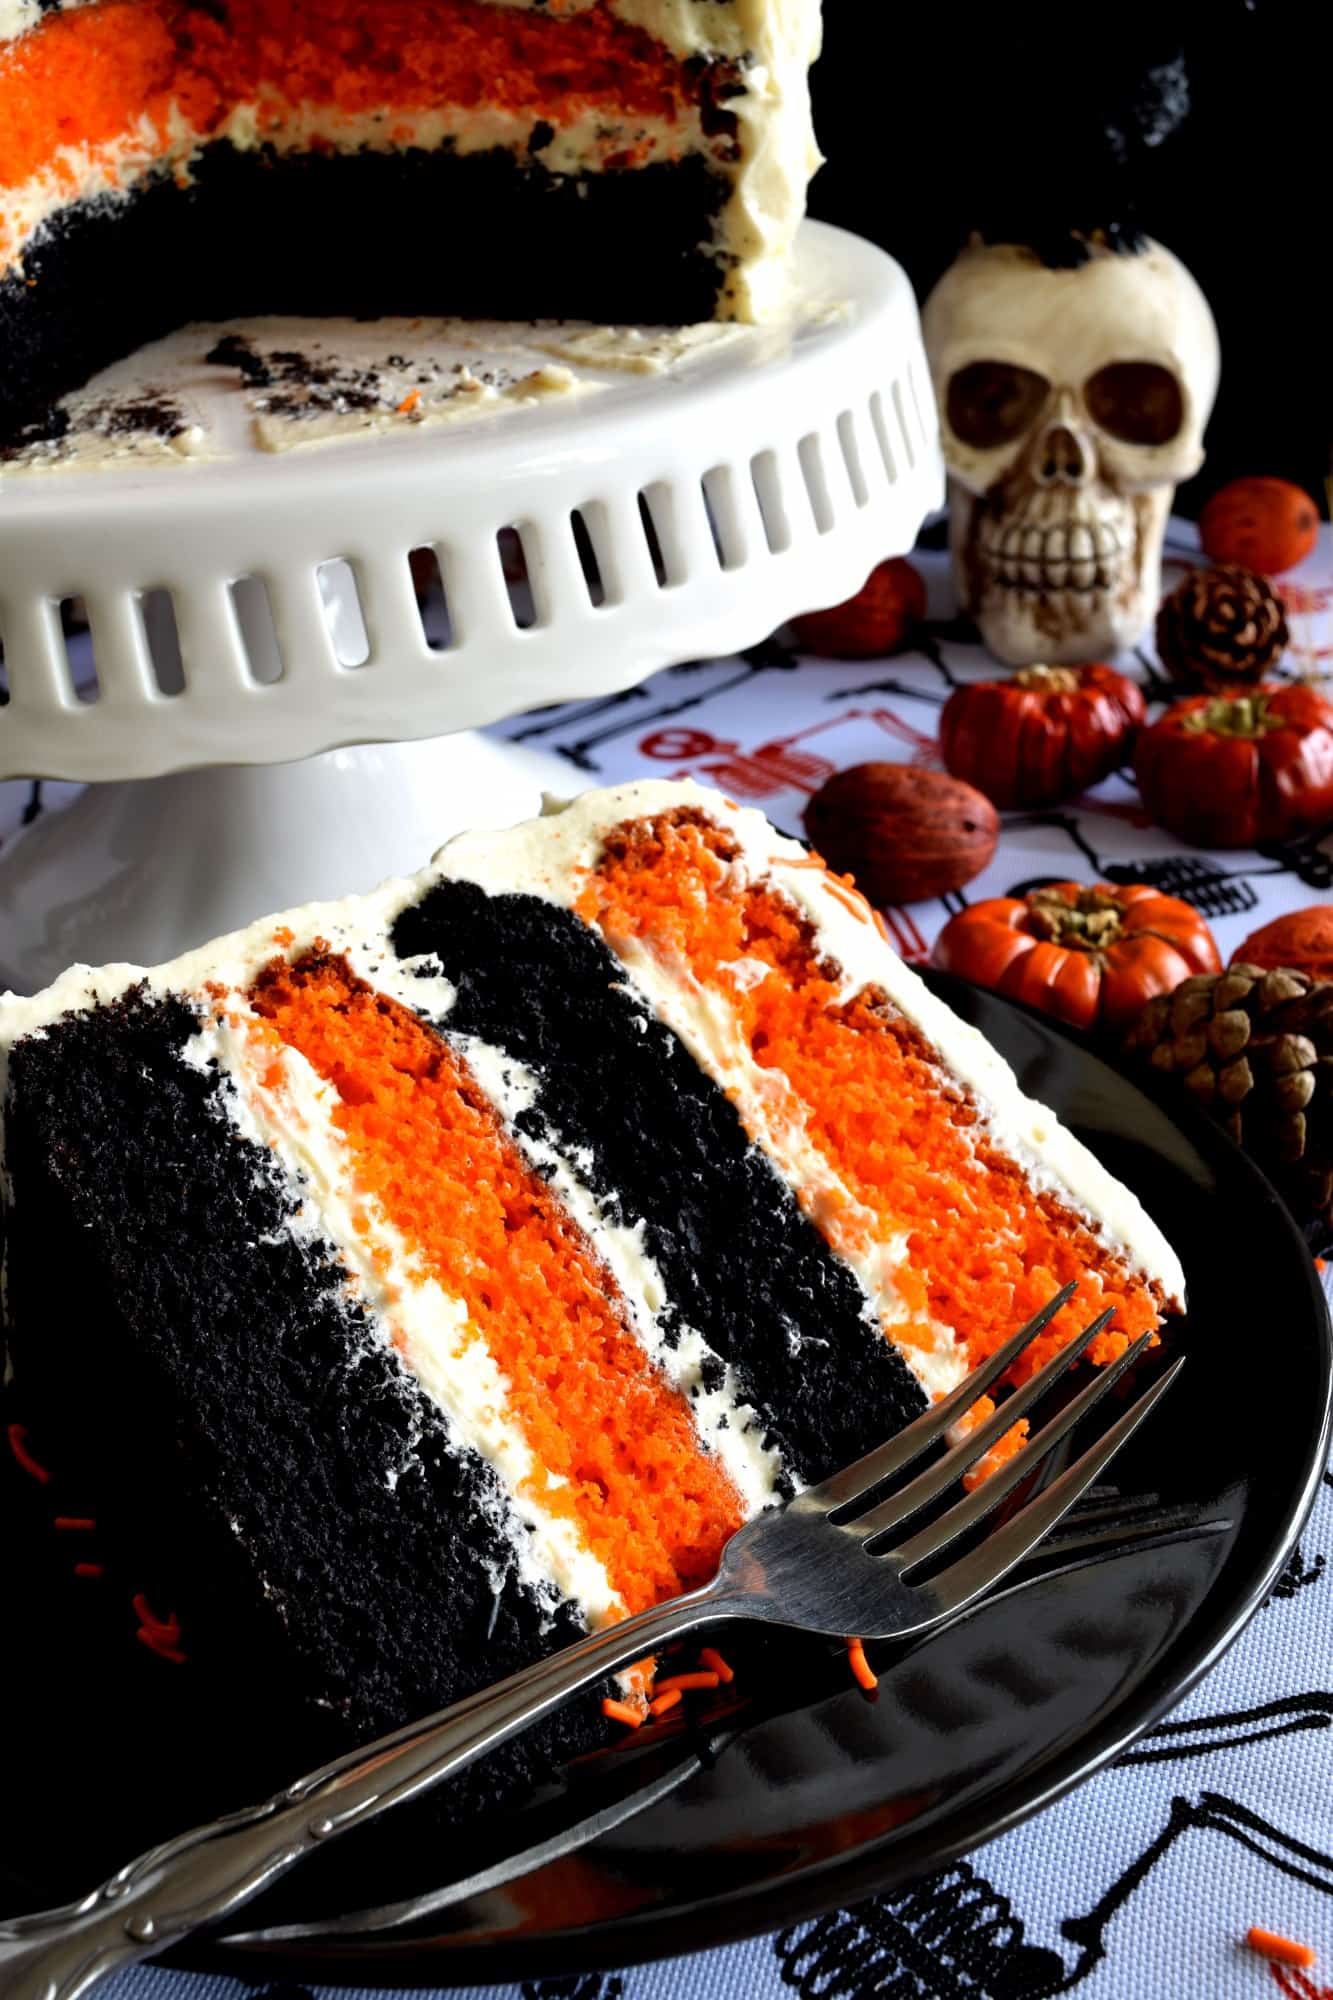
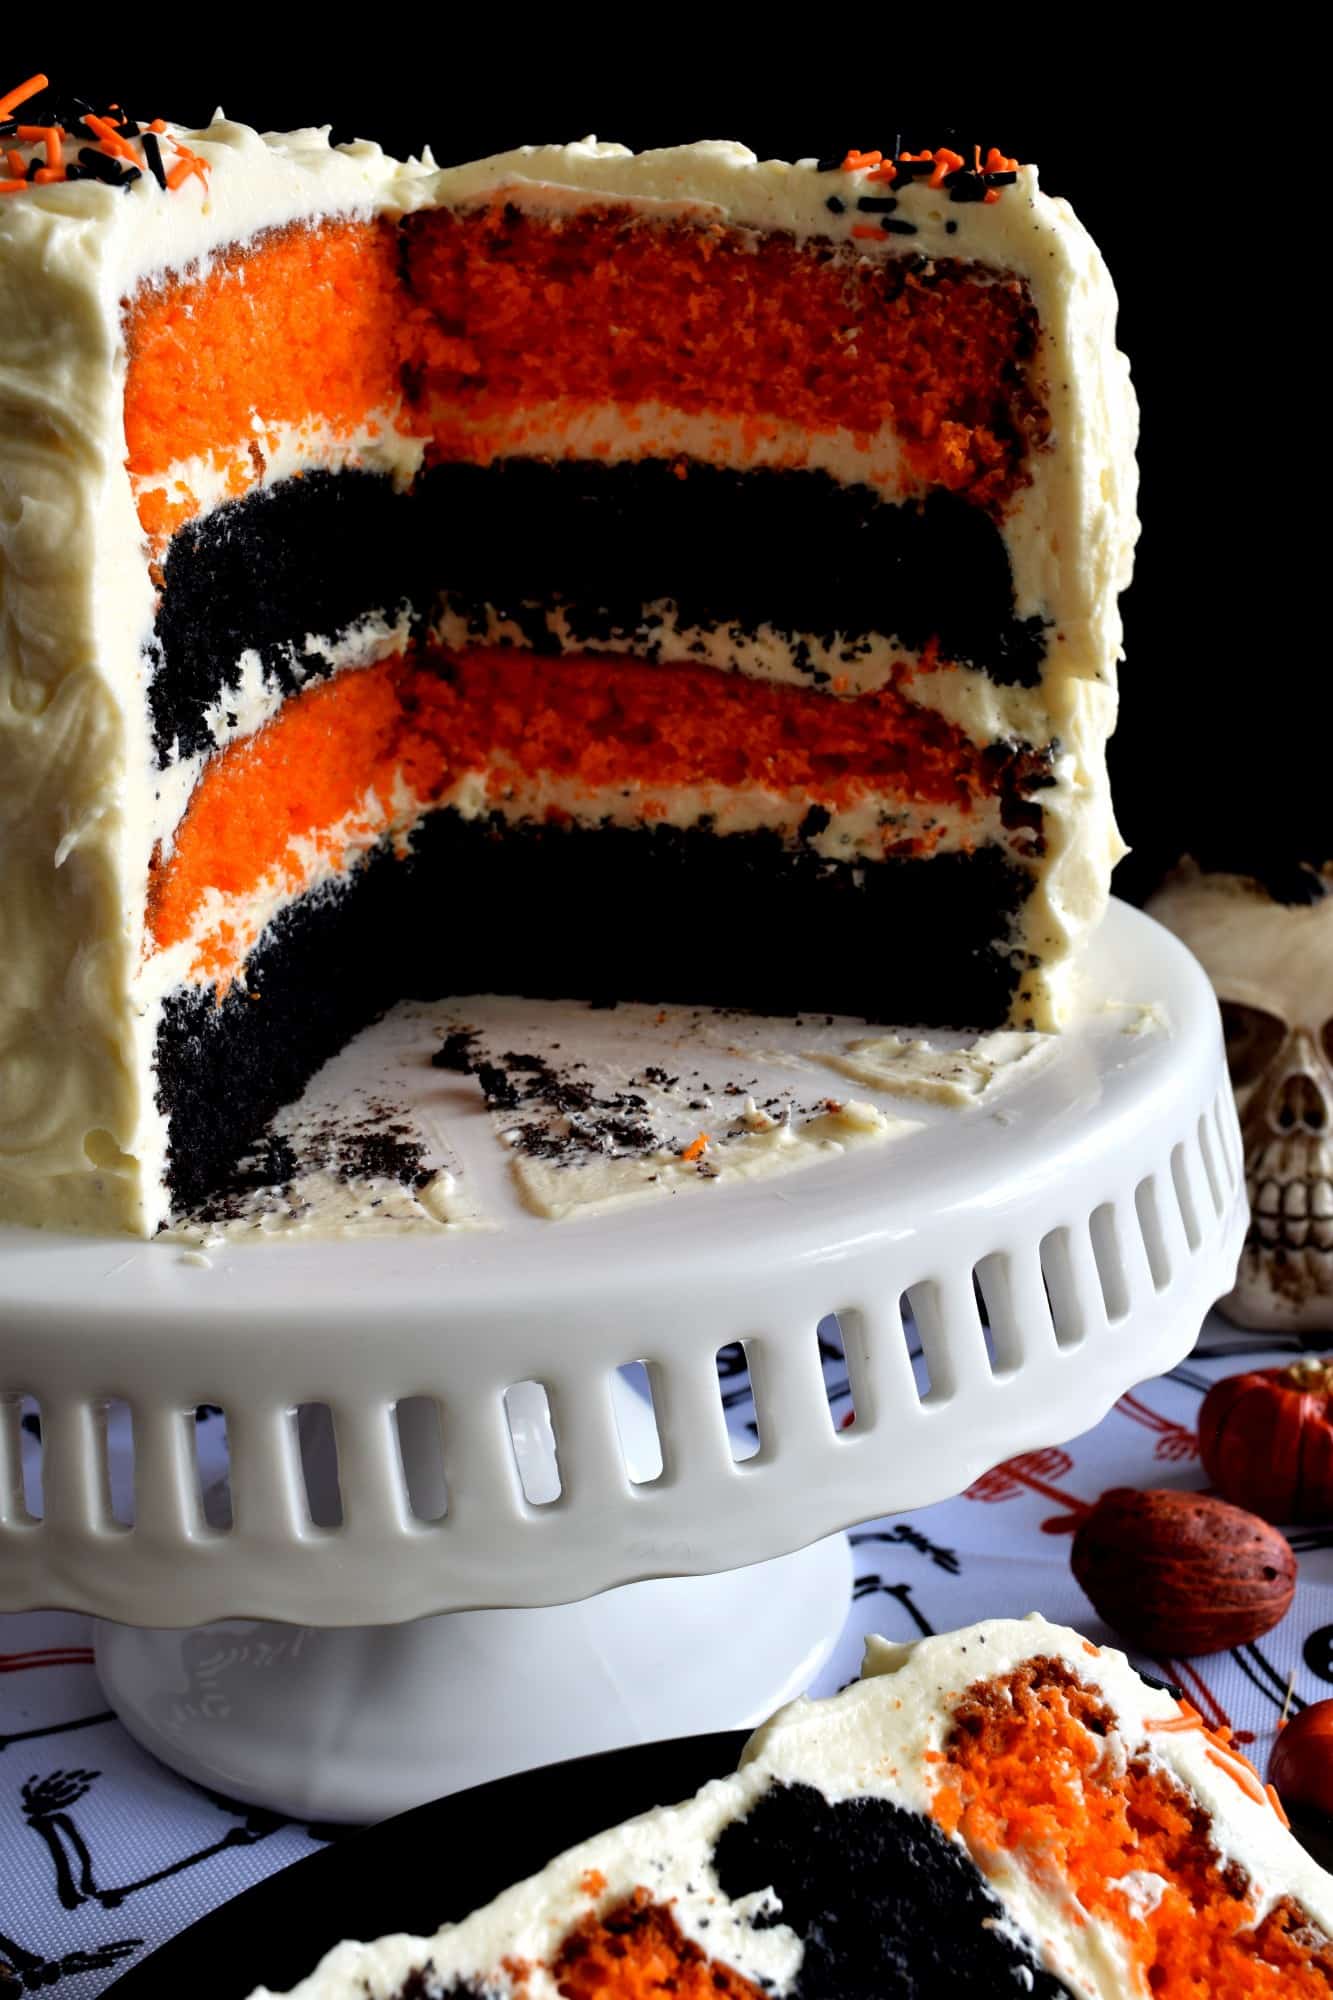
- Divide the batter equally into two bowls. Add a few drops of orange food colouring to one bowl of cake batter and add a few drops of black to the other. Stir until fully incorporated - use a different spoon for each bowl of batter - do not mix the colours.
- Next, pour all of the orange batter into one cake pan, and the black cake batter into another cake pan.
- Bake for 30 minutes, testing with a toothpick for doneness at the 25 minute mark. (Insert clean wooden toothpick into the center of the cake. If the toothpick comes out clean, the cakes are done. If the toothpick comes out with batter on it, continue the baking process for a few more minutes. Test again.)
- Remove from oven. Place pans on a cooling rack and let set for 10-15 minutes before turning out onto the cooling rack to continue the cooling process.
For the Frosting
- Dump all of the ingredients into a large bowl and mix with a hand-held mixer until smooth and creamy.
Assembly
- When cooled, slice each cake in half with a long serrated knife. Add a tablespoon of the frosting to your cake stand or cake board - whichever you use to decorate and/or present your cake. This frosting will prevent the cake from sliding.
- Position one cake half onto the cake stand. Using about one cup of frosting, and an offset spatula, frost the top surface of the cake. Place the next layer on top, alternating in colour, and gently push down evenly and firmly on the cake to get a good bond or seal. Then, repeat the frosting process. Do this until all four layers are piled and frosted.
- Next, still using your offset spatula, scoop up the frosting and smear it liberally around the perimeter of the cake.
- Next, use a Q-tip, which has the cotton end moistened in water, and patted dry with paper towel, and draw figure eight symbols/lines around the cake. Do not push the Q-tip too deeply into the frosting - just drag the surface layer of frosting.
- Lastly, top with sprinkles if you wish. Refrigerate for about an hour, just to let the frosting firm up.
- Slice and enjoy!

All access to Lord Byron’s Kitchen! Never miss another recipe! Follow me on FACEBOOK, INSTAGRAM, AND PINTEREST!


Stine Mari says
I love this idea, and I think this will be the cake I’ll be making this Halloween! Thank you for the recipe, and the cake looks super moist too. I almost can’t wait.
byronethomas@gmail.com says
Thank you, Stine.
Hadia says
This is just beautiful, Bayron!
byronethomas@gmail.com says
Thank you, Hadia.
Vonnie J. says
For the icing, what is pumpkin spice extract? I have pumpkin pie spice but does it come in a liquid?
Thanks,
Vonnie
byronethomas@gmail.com says
Hi Vonnie,
Pumpkin extract is a liquid and it’s just like vanilla extract. You can easily find it in the baking section at most grocery stores. I tend to buy mine at Walmart and I love the Watkins brand.
Carol says
Howdy, looked everywhere for the extract and no luck. How much dry spice would you advise?
byronethomas@gmail.com says
Hi Carol,
I used the Watkins brand which you can find at almost any Walmart, although, they might be out of stock this time of year, because everyone is making everything pumpkin spice flavour. 🙂 I like a strong pumpkin spice presence in my baked goods, so I would use the same amount of pumpkin spice blend as the pumpkin spice extract.
CAMILLE ROBINSON says
Probably never get around to making the gorgeous cake but OMG!…Laughed so hard at your ‘Parents will talk about you behind your back,’ monologue. Thank you for that! That bit made NOT making the cake completely worth it!
p.s. Of course I saved the recipe anyway…because you never know!
byronethomas@gmail.com says
Ha! Thank you, Camille. 🙂