
Gather together all of your Easter basket goodies and assemble an Easter Charcuterie Board for your friends and family. It’s such an easy way to serve up dessert after dinner, because everything is ready to go, and there’s no mess or fuss. All you need is a bunch of napkins and cups of hot coffee for everyone because coffee and chocolate cannot be beat!
Charcuterie boards are everywhere these days, and it seems that there’s a theme for just about everything. With an abundance of store-bought chocolates and treats, I put together this Easter Charcuterie Board to show you just how easy it is to make a board that is super impressive, but super easy too!
Everything you see on the board in these photographs is store-bought. But, I’m going to include recipe links just in case you want to add some homemade goodies to your board too. Most charcuterie boards will include thinly sliced meats and cheeses, along with olives and pickles. And, you can certainly add those things to your board if you’re putting out your charcuterie before dinner as an appetizer.
In this case, I’m sticking to desserts only, because my Easter Charcuterie Board is meant to be a substitute for traditional Easter desserts like carrot cake, for example. Depending on what type of gathering you are hosting, you can change the board items accordingly.
Make your own online recipe box!
Click the in the lower right corner of your screen
& follow the quick and easy instructions!
WHAT IS CHARCUTERIE ANYWAY?
Charcuterie is a French term meaning “flesh” and “cooked.” It is a branch of cooking devoted to prepared meat products, such as bacon, ham, sausage, terrines, pate, etc. Originally intended as a way to preserve meat before the advent of refrigeration, they are prepared today for the flavours derived from the preservation processes.
Today, when we hear the term charcuterie, most of us immediately know that we are referring to the preparation and artful assemble of arranging items like cured meats, hard and soft cheeses, dried and fresh fruits, vegetables, and crackers or bread on a large wooden board.
Charcuterie has been popular in many parts of Europe for many, many years. In fact, there’s documented evidence of charcuterie being present in ancient Roman times. The popularity of these boards did not catch on here in North America until recently. Now, they’re everywhere! And, I’m going to show you how to make a charcuterie board specifically for Easter!
INGREDIENTS NEEDED FOR THIS RECIPE:
The following is a list of the items needed to prepare an Easter Charcuterie Board. Please keep in mind that the number of items you will need will greatly depend on how many people you are preparing the board for. Also, these items are suggestions only. Feel free to switch it up with things that you love, or things that you can find in your local area.
1. Focal Point
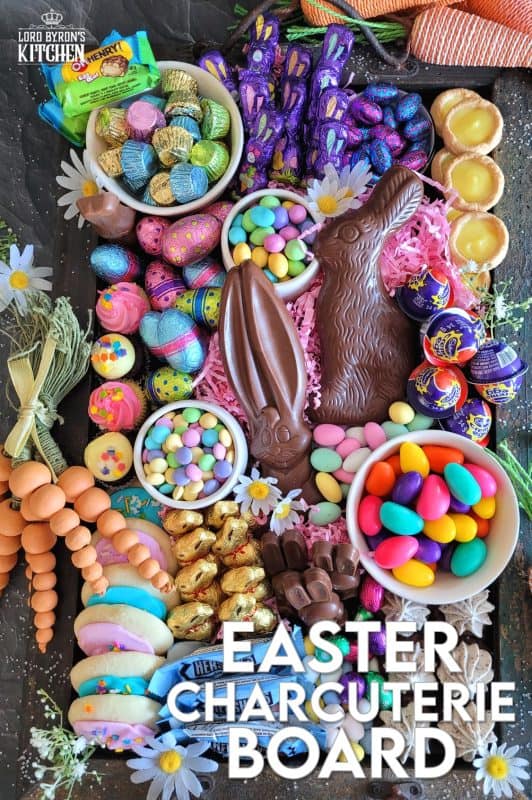
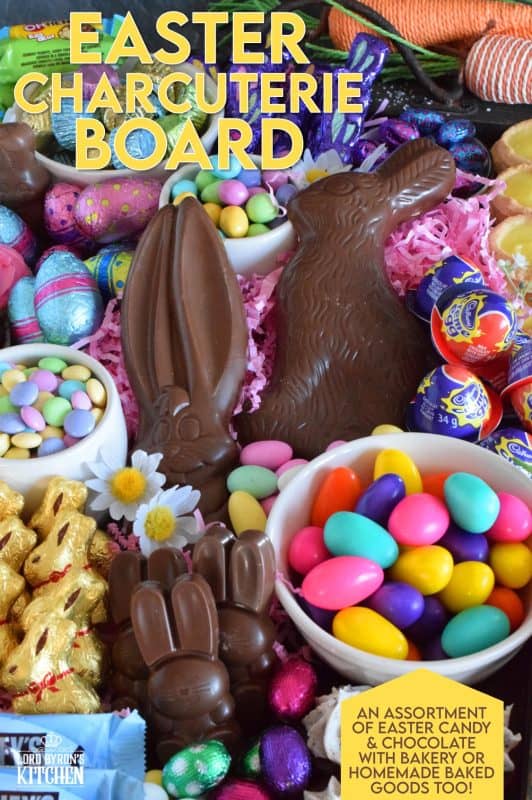
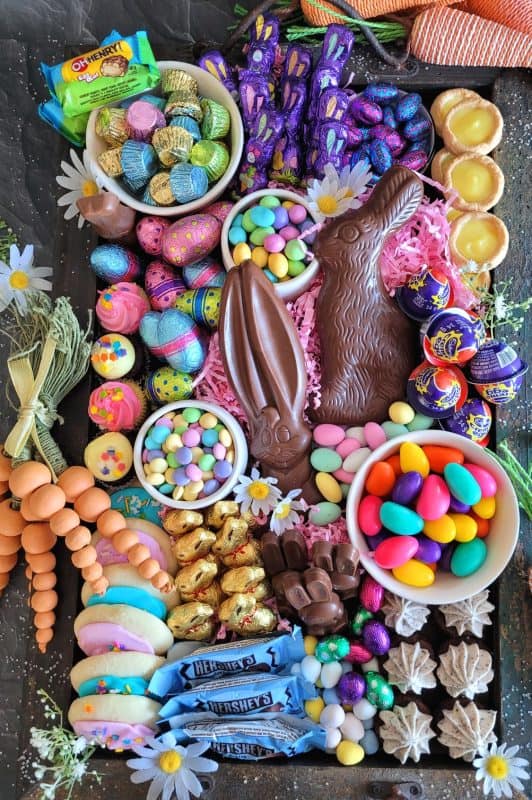
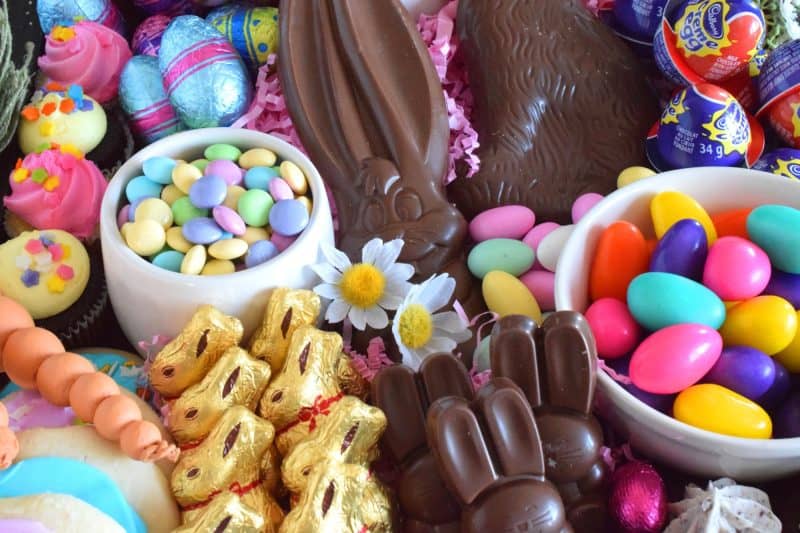
I bought two large, solid chocolate bunnies to start with. They were both positioned in the center of my board. I think every charcuterie should have a main focal point, and these large chocolate bunnies are perfect! I used food-safe, shredded pink paper grass to prop up the bunnies so that they were elevated. Different heights are important to creating a visually stunning board.
2. Various Chocolates
As previously mentioned, you can buy the type of chocolate you prefer. I’m using lots of store-bought chocolates with varying shapes, sizes, flavours, and brands. The one thing that I do recommend is that you source chocolates that are individually wrapped. Charcuterie boards are meant to be picked at, so using wrapped candies prevents the need for tongs or scoops. You don’t want everyone’s fingers on everything!
3. Baked Goods
I included a few baked goods on my Easter Charcuterie Board. You don’t need to bake everything yourself, but you can if you want. I included little lemon tarts. You can buy frozen tart shells from most grocery stores which you can easily bake at home. And, fill them with Gloria’s homemade lemon curd! Next, I added some Lofthouse cookies on the board. Here’s my favourite lofthouse cookie recipe. I also added some mini bakery style cupcakes and some frosted two-bite brownies.
4. Candy
An Easter Charcuterie Board would not be complete without candy! I used both brightly coloured Marshmallow Creme Eggs and lots of pastel M&M’s of both the chocolate and peanut variety. Cadbury Mini Eggs were a must! And, so were the hollow and solid mini milk chocolates wrapped in foil that everyone knows and loves.
Finally, I added a few packaged Easter Eggs that we used to get when we were kids. Remember those Chocolate Marshmallow Eggs and the Oh Henry Bars!? Finally, for the sake of McKenna’s sweet tooth, I added a few Cadbury Creme Eggs.
HOW TO ASSEMBLE YOUR EASTER CHARCUTERIE BOARD
CREATE A FOCAL POINT
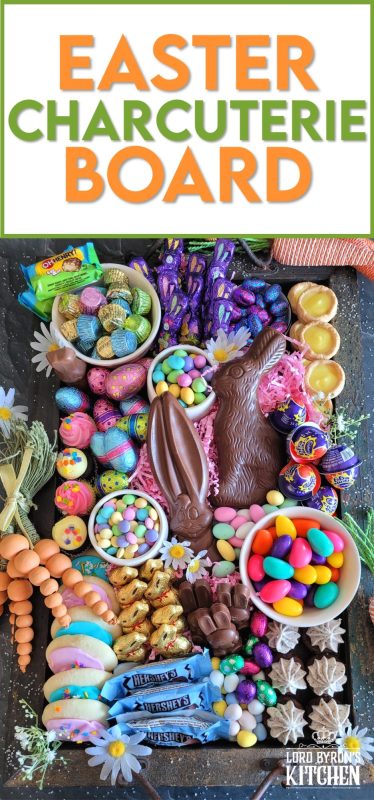
The first thing you want to do is to source a board. The number of people you are serving and the number of items you have to place on the board will help to determine the size you will need. I’m using a decorative wooden board with metal handles. You can find those types of serving trays at any home decor store, like Marshalls or Winners. You can certainly use a large cutting board too.
When I start to build the board, I want to create a centrepiece or a focal point, as I mentioned previously. I’m using two solid chocolate bunnies that I propped up with food-safe pink paper grass. Note that I also nestled small bowls of candy-coated chocolates under the ears of each large chocolate bunny. The paper grass will evenly flatten under the weight, but the bowls will keep the bunnies slightly elevated.
The thing about assembling a charcuterie board is that you can easily move things around is something doesn’t work, visually speaking, for you. I like to start by placing the baked goods on the board first. You won’t want to move your baked goods around too much, because you run the risk of breaking them or messing up their finish. Get those into place first, before moving on to the chocolates and candies.
Do you have a question or comment?
Would you like to leave a review?
Scroll down to the comment section and write me a message.
I will personally respond as soon as possible!
ADDING TO AND FILLING IN THE GAPS
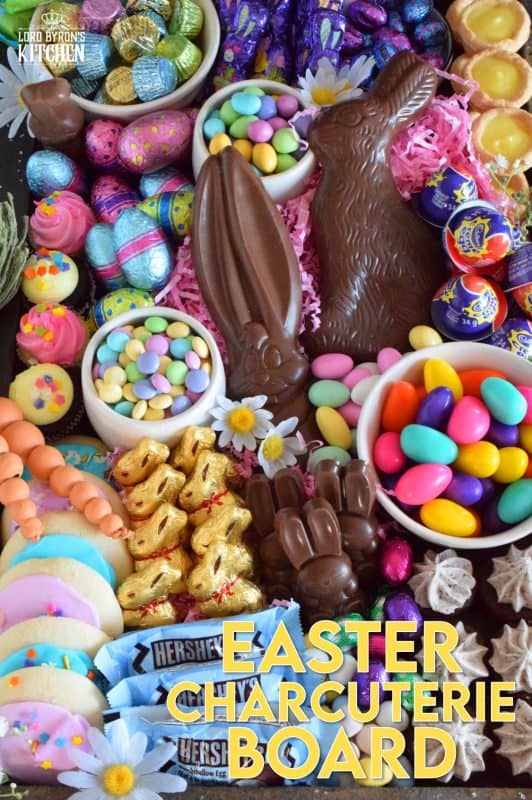
Next, let’s set the little serving bowls into place. On this board, I’m using a total of five bowls. I have a bowl of regular M&Ms, a bowl of peanut M&Ms, a bowl of marshmallow creme eggs, a bowl of Hershey’s white chocolate speckled eggs, and finally, a bowl of Reece’s Peanut Butter Cups. Two of those are individually wrapped and didn’t need bowls, but using bowls creates texture and keeps things in one place too.
When that is done, it’s time to fill in the gaps. This is where I use a lot of wrapped confections. I have a bunch of purple foiled-wrapped Cadbury bunnies, larger hollow chocolate eggs, a few Cadbury Creme Eggs, some mini Lindt Chocolate Bunnies, and some mini foil-wrapped chocolate eggs. I also placed a few unwrapped KitKat bunnies in a standing-up position, once again, creating height.
DECORATIVE TOUCHES
Finally, it’s time to add some decorative touches. This is optional, but I included a bunch of wooden beaded carrots on the side of the board. This makes the board look bigger and creates the image that there is so much on the board that it is spilling over. I also placed a few string-wrapped decorating carrots around the board, and some craft store baby’s breath and daisies. These just add a spring-like look. Charcuterie boards are all about the food, but they can be pretty too, right!?
Now, wasn’t that easy!? If you do create your own Easter Charcuterie Board at home, please send me a photo or tag me on social media. I would love to see what you come up with because no matter how detailed the instructions in this post are, everyone will have a different look and feel to their board. Have fun with it, photograph it, and then eat it! Happy Easter!!!
Do You Like This Recipe?
You should consider trying these other delicious recipes too!


Easter Charcuterie Board
Ingredients
- 2 large solid chocolate bunnies
- 8 small lemon tarts
- 6 two-bite brownies
- 6 lofthouse cookies
- 4 mini cupcakes
- 3 chocolate marshmallow eggs
- 2 Oh Henry Bars
- 10 mini Cadbury bunnies
- 3 KitKat bunnies
- 8 mini Lindt Chocolate bunnies
- 6 Cadbury Creme Eggs
- 8 hollow chocolate eggs
- 1 cup Reece's Mini Peanut Butter Cups
- 1 cup Marshmallow Creme Eggs
- 1/2 cup Hershey's White Chocolate Speckled Eggs
- 1/2 cup Chocolate M&Ms
- 1/2 cup Peanut M&Ms
- 1/2 cup mini chocolate eggs
- 1/2 cup Cadbury Mini Eggs
- 1/2 cup chocolate covered almonds
Instructions
- When I start to build the board, I want to create a centerpiece or a focal point, like I mentioned previously. I’m using two solid chocolate bunnies that I propped up with food-safe pink paper grass. Note that I also nestled small bowls of candy coated chocolates under the ears of each large chocolate bunny. The paper grass will evenly flatten under the weight, but the bowls will keep the bunnies slightly elevated.
- The thing about assembling a charcuterie board is that you can easily move things around is something doesn’t work, visually speaking, for you. I like to start with placing the baked goods on the board first. You won’t want to move your baked goods around too much, because you run the risk of breaking them or mussing up their finish. Get those into place first, before moving on to the chocolates and candies.
- Next, let’s set the little serving bowls into place. On this board, I’m using a total of five bowls. I have a bowl of regular M&Ms, a bowl of peanut M&Ms, a bowl of marshmallow creme eggs, a bowl of Hershey’s white chocolate speckled eggs, and finally, a bowl of Reece’s Peanut Butter Cups. Two of those are individually wrapped and didn’t need bowls, but using bowls creates texture and keeps things in one place too.
- When that is done, it’s time to fill in the gaps. This is where I use a lot of wrapped confections. I have a bunch of purple foiled wrapped Cadbury bunnies, larger hollow chocolate eggs, a few Cadbury Creme Eggs, some mini Lindt Chocolate Bunnies, and some mini foil-wrapped chocolate eggs. I also placed a few unwrapped KitKat bunnies in a standing up position, once again, creating height.
- Finally, it’s time to add some decorative touches. This is optional, but I included a bunch of wooden beaded carrots on the side of the board. This makes the board look bigger and creates the image that there is so much on the board that it is spilling over. I also placed a few string-wrapped decorating carrots around the board, and some craft store babies breath and daisies. These just add a spring-like look. Charcuterie boards are all about the food, but they can be pretty too, right!?
Did you make this recipe?
Upload a photo and tag me so that I can see it!


Leave a Reply