
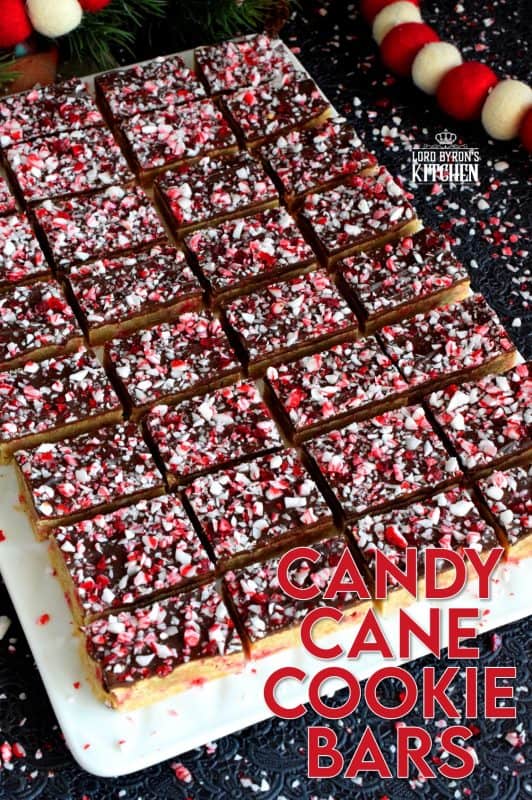
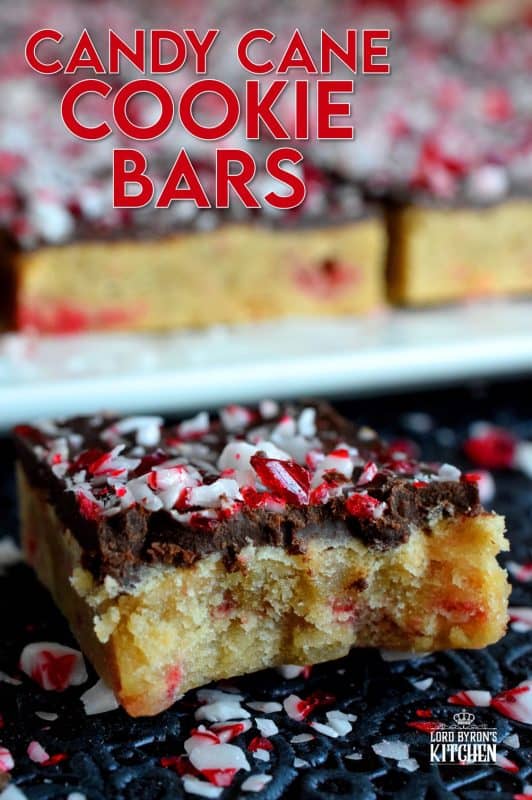
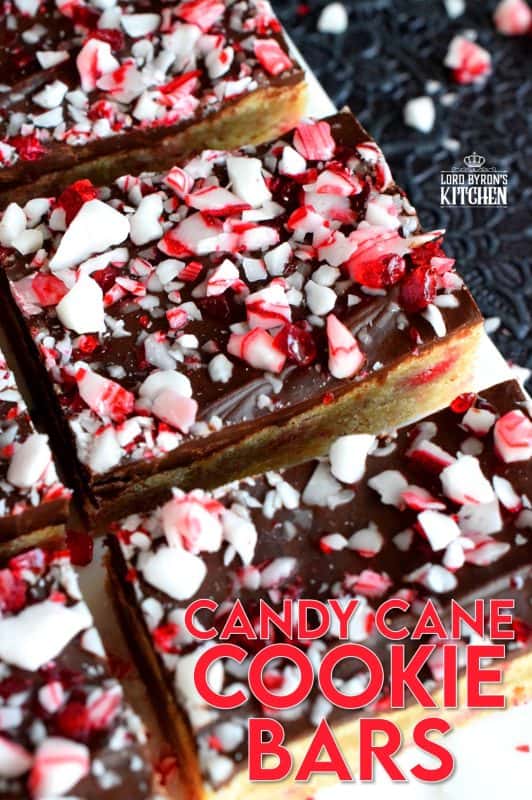
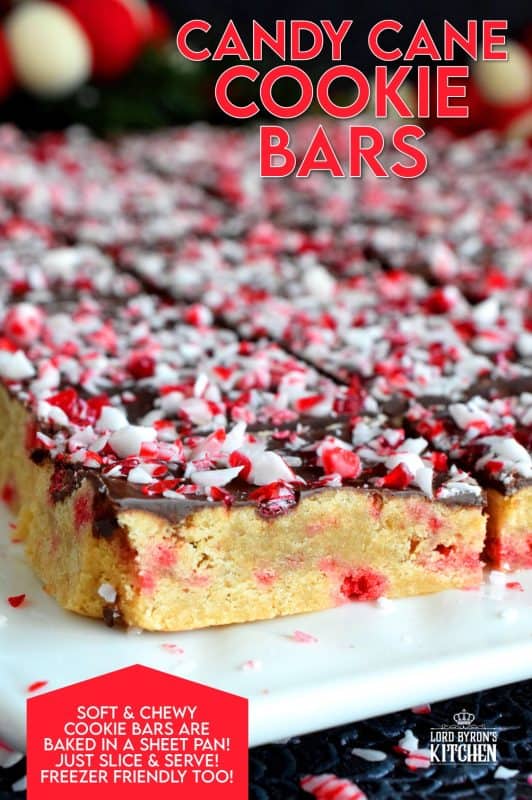
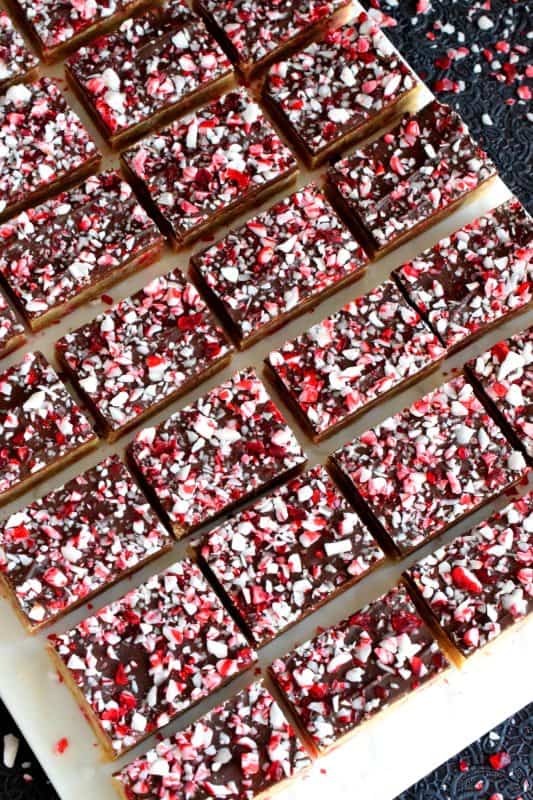
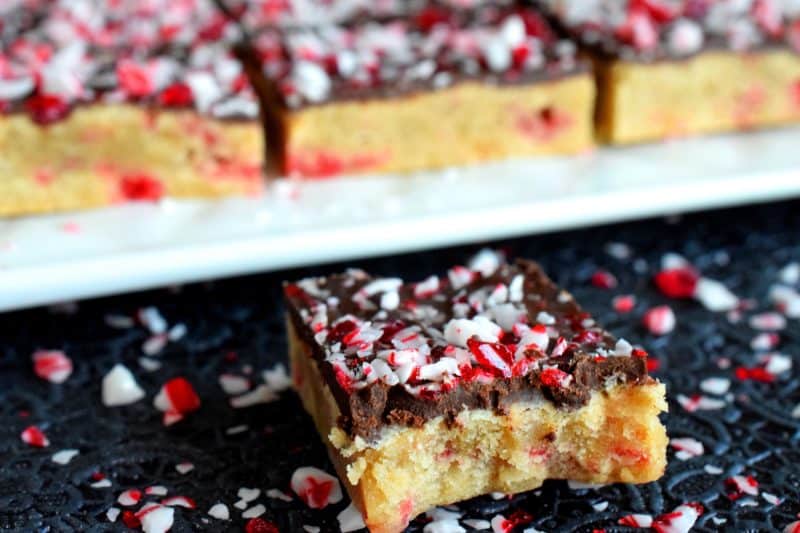
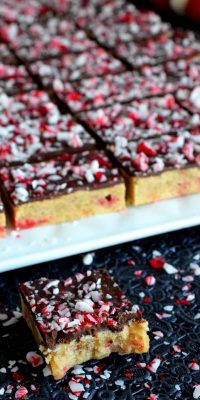
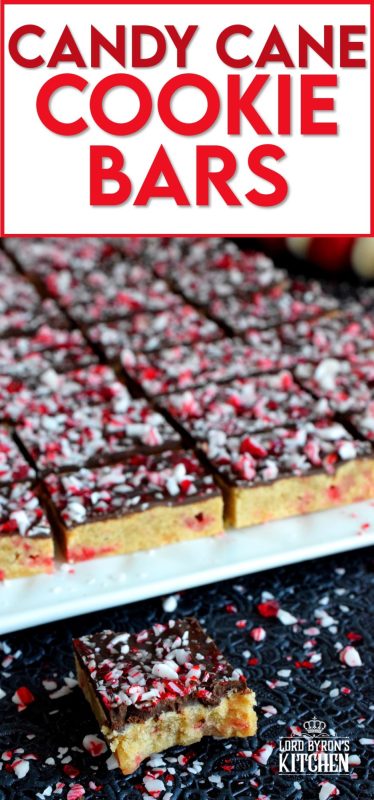
Soft and moist Candy Cane Cookie Bars, which are baked in a sheet pan, then smeared with melted chocolate, and topped with more crushed candy canes, is bound to be a new holiday favourite! These make holiday baking fun and easy!
Every Christmas I try to find a new recipe with candy canes as one of the main flavours or ingredients. And, to be completely honest, I’m not a big fan of candy canes at all, but when paired with chocolate or cookies, the taste seems to transform into something magically Christmas. Just look at these beautiful Candy Cane Cookie Bars – who could resist?
I remember back to when I was a kid, candy canes were a very popular Christmastime treat for us kids. Growing up in a small town, I remember our annual Santa Claus parade, which was very small and unique in comparison to the large, multi-block, sidewalk-lined parades you see in cities today.
Our Santa Claus parade used to consist of a few cars or pick-up trucks which were donned with leftover ornaments and tinsel. There may have been a few vehicles with a hand-painted banner tied to it as well. And, oftentimes, there was an ATV or two in the parade as well.
Make your own online recipe box!
Click the in the lower right corner of your screen
& follow the quick and easy instructions!
HERE COMES SANTA!
The best part though, was the last vehicle, which was usually a pick-up truck. Santa would be in the back with a few of his helpers. That truck had a Christmas tree. The driver would have his windows rolled all the way down, and festive Christmas music would be blaring from the cassette or eight-track deck. (I’m aging myself!) And, Santa would toss out those little individually wrapped candy canes to all of us kids.
It was such a fantastic day and such a great treat. I remember it well; all of us would stand knee-deep in the snow banks that had been piled up on the sides of the road. Newfoundland is most certainly known for lots of snow, so you can bet that by the time the Santa Claus parade was scheduled in mid-December, the snow was piled high and there to stay until at least April!
THE EARLY BIRD GETS THE WORM!
I could talk about those memories forever if I had the time. Things are most certainly not like they used to be! Christmas now is fast and hurried. It’s expensive and we all forget to slow down and enjoy the time with our family and friends. We start Christmas early, because we love it. And, I strive to have all of my Christmas shopping done by the end of November, so that I don’t have any of that last-minute December shopping stress.
Baking – well, that’s not stressful at all. I love it! If I were to hazard a guess, I would say that I bake at least two or three times each week as soon as October rolls around. And, in December, I probably bake even more. Baking is my stress-reliever, and it can be yours too – especially if you candy!
INGREDIENTS NEEDED FOR THIS RECIPE
The following is a list of the ingredients needed to prepare this recipe. For exact amounts and measurements, refer to the printable recipe card located near the bottom of this post.
- Butter – Make sure your butter is at room temperature! I have prepared these with both salted and unsalted butter and there is no difference in taste or appearance. Use what you have on hand.
- Brown Sugar – First of all, it has way more flavour than regular white sugar! And, in this recipe, brown sugar helps to keep the cookie moist and soft.
- Egg – One large egg is all you need. Whenever you set out to bake, make sure your eggs are at room temperature too – just like your butter!
- Flour – No need for anything special. Just use regular all-purpose flour. I have not tried this recipe with any other type of flour.
- Salt – This is a common ingredient in baking and cooking. In baking it helps to enhance and balance sweetness.
- Vanilla Extract – Probably the most common extract and the most common flavouring used in cakes and cookies.
- Chocolate Chips – I use chocolate chips a lot in my recipes, and I change up the type depending on how I feel. Unless the recipe states otherwise, you can use milk, semi-sweet, or dark chips.
- Crushed Candy Canes
HOW TO MAKE CANDY CANE COOKIE BARS
In a large bowl, cream together the butter and the sugar with a mixer. Add the egg and mix well into the butter mixture. Add the flour, salt, vanilla and 1/4 cup of crushed candy canes. Mix well to combine.
Line a baking sheet with parchment paper. I always use a half sheet pan, which is 18″x13″ Turn the cookie mixture out onto the parchment paper and press with your hands to form a flat, rectangular-shape, about 1/4 inch thick. Bake at 350 degrees for 20 minutes.
Remove from oven and sprinkle the chocolate chips evenly over the cookie base. Return the oven for 90 seconds.
Remove from oven and smear the chocolate evenly with an offset spatula. Sprinkle with the remaining 1/2 cup crushed candy canes.
Refrigerate for 30 minutes. Using a pizza cutter, trim along the rough edges (those are for you to munch on right away!) and cut the entire cookie into 32 squares.
Looking For More Christmas Confections?
Lord Byron’s Kitchen has more than enough to satisfy your sweet tooth! Click on the links below to see a countdown series of holiday recipes from that category!
MAKING YOUR OWN CRUSHED CANDY CANES
If you don’t want to use the red and white ones – which are the easiest to find – then you can crush your own candy canes by placing unwrapped, broken candy canes into a sturdy bag and firmly rolling over them with a wooden rolling pin.
Either way you look at it, the candy canes should not be crushed too finely. Many times, you’ll find they have too much powder, meaning that they have been crushed too much. You want chunky pieces in order to get the red and green speckled pattern.
I’ve tried crushing them myself and have crushed them a little too much. Even the type you buy in the store can sometimes have too much candy cane dust. You can easily fix it by filtering out the dust. Working in small amounts, place a heaping spoonful of the crushed candy canes into colander. Sift out the dust so that you are left with nice little pieces.
STORING, PACKAGING, & FREEZING
Most cookies taste best at room temperature. However, don’t leave them sitting out on your countertop for long periods of time. Cookies will stay fresh in a cookie jar or food-safe container with a lid for 3-5 days if left to sit on your kitchen countertop. You can store them in a food-safe container in your fridge. When you want one, two, or half a dozen, take them out of the container and place them in a single layer on a plate. Let them sit at room temperature for 5 minutes and they’re ready!
If you plan to freeze your Candy Cane Cookie Bars, you certainly can! Once cool, pile them into a clean, food-safe container. The container must be freezer friendly! You’ll want to ensure a very tight fitting lid too. I use these quite often when freezing baked goods. I like to place a sheet of plastic wrap over the top of the container before pushing the lid on. This helps to create a better seal. The goal is to keep all of that freshness locked in!
You can freeze these cookies for up to three months. If you plan to give previously frozen cookies as a gift, I would lay them out onto a wire cooling rack to thaw completely. Once thawed, pile into cellophane bags and tie with a ribbon, or stack in a cookie tin/box. Sometimes, depending on the brand of candy cane, when you thaw them, they tend to get sticky. If this happens, leave them to dry a bit more, or dust them with confectioner’s sugar!
QUESTIONS?
If I have not answered all of your questions in the text above, don’t hesitate to reach out to me! You can contact me by sending me a message in the comments section further down the page. I will try my best to answer as soon as possible! You might reach me even faster by following me on Facebook and sending me a private message. Scroll down to follow me and never miss another recipe!
Lord Byron’s Annual Christmas Cookie Series
Did you know that Lord Byron’s Kitchen has been sharing a 24 Cookies of Christmas Series for the past several years? Click on the links below to see all of the recipes from each series on one page!
Do You Like This Recipe?
You should consider trying these other delicious recipes too!


Candy Cane Cookie Bars
Ingredients
- 1 cup butter, room temperature
- 1 cup brown sugar, lightly packed
- 1 large egg
- 2 cups all-purpose flour
- 1/2 teaspoon salt
- 1 teaspoon vanilla extract
- 3/4 cup candy canes, crushed
- 2 cups mini chocolate chips
Instructions
- In a large bowl, cream together the butter and the sugar with a hand mixer.
- Add the egg and mix well into the butter mixture.
- Add the flour, salt, vanilla and 1/4 cup of crushed candy canes. Mix well to combine.
- Line a baking sheet with parchment paper. I always use a half sheet pan, which is 18″x13″
- Turn the cookie mixture out onto the parchment paper and press with your hands to form a flat, rectangular-shape, about 1/4 inch thick.
- Bake at 350 degrees for 20 minutes.
- Remove from oven and sprinkle the chocolate chips evenly over the cookie base.
- Return the oven for 90 seconds.
- Remove from oven and smear the chocolate evenly with an offset spatula.
- Sprinkle with the remaining 1/2 cup crushed candy canes.
- Refrigerate for 30 minutes. Using a pizza cutter, trim along the rough edges (those are for you to munch on right away!) and cut the entire cookie into 32 squares.
Nutrition
Did you make this recipe?
Upload a photo and tag me so that I can see it!


WhitBit's Indian Kitchen says
What a neat idea! I see a lot of candy cane bark, but I like how you did something different!
Whitney says
I LOVE mint + chocolate flavor too. These bars look so delish!! 🙂
Brian Jones says
Excellent Byron, these look like perfect Boxing day treats, so very festive!
Paige says
Beautiful holiday treat Byron! I’ve never seen already-crushed candy canes here, but next time I’m at Marshall’s I’m going to be on the look-out! They look like the perfect ingredient!
Hillary Reeves says
OMG you’re so right… my “crushed” candy canes are basically a powder. Brilliant find!!
byronethomas@gmail.com says
LOL – same here!
Mary (The Godmother @ Goodie Godmother) says
I didn’t need another reason to love going to HomeGoodes… but I’ll have to keep my eye out for the crushed candy canes! I cruise the sprinkle section regularly, but haven’t picked these up yet as peppermint candy canes alone aren’t really my favorite holiday treat. Peppermint and dark chocolate though…
byronethomas@gmail.com says
I just got an $80 gift card for Christmas, so back I go! 🙂
Ava says
What size pan do you use?
byronethomas@gmail.com says
Hi Ava – it’s 18″ x 13″. I’ve updated the post accordingly. Thank you.
Carmen says
I’ve made this twice- a couple of things- I’ve don’t it in the 18 x 13 pan and I find them too flat so I use the 11 x 17, just my prefer nice the other thing is that the dough is very sticky to handle when pressing into the pan-I’ve buttered my hands, used a knife to spare and still find it a challenge any tips for that??
When done they look and taste lovely
Candace says
I’ve put a piece of parchment paper on top of the dough and then flattened it out with my hands on the paper.
Cait says
It was so easy to make! I had a bit of a struggle trying to spread the cookie mixture in the pan, but gave in and used my hands. So much easier!